• طريقة واحدة لالتقاط صور أفضل بالرسم بالضوء في الليل
    One Way to Take Better Light Painting Photos at Nightإذا سبق لك أن جربت الرسم بالضوء لتصوير درب التبانة، فربما واجهت بعض المشكلات المحبطة. ربما لم تتطابق درجة حرارة لون الضوء مع المشهد، أو أن الظلال والإبرازات تبدو مصطنعة بطريقة أو بأخرى. أو ربما حصلت على تأثير تسليط الضوء الذي لم يغطي مساحة واسعة بما فيه الكفاية.

    يجب أن أعترف أنني لم أتوقع أن أكتب مقالاً عن الرسم بالضوء هذا العام. لقد واجهت محاولاتي السابقة دائمًا المشكلات التي ذكرتها للتو – وكانت النتيجة النهائية هي الصور التي تبدو مزيفة ومصطنعة، وتشتت الانتباه عن المشهد بدلاً من إضافته إليه. “اللوحة الضوئية” الوحيدة التي كنت سأرسمها بانتظام هي انتظار ظهور القمر وإلقاء الضوء على المناظر الطبيعية!

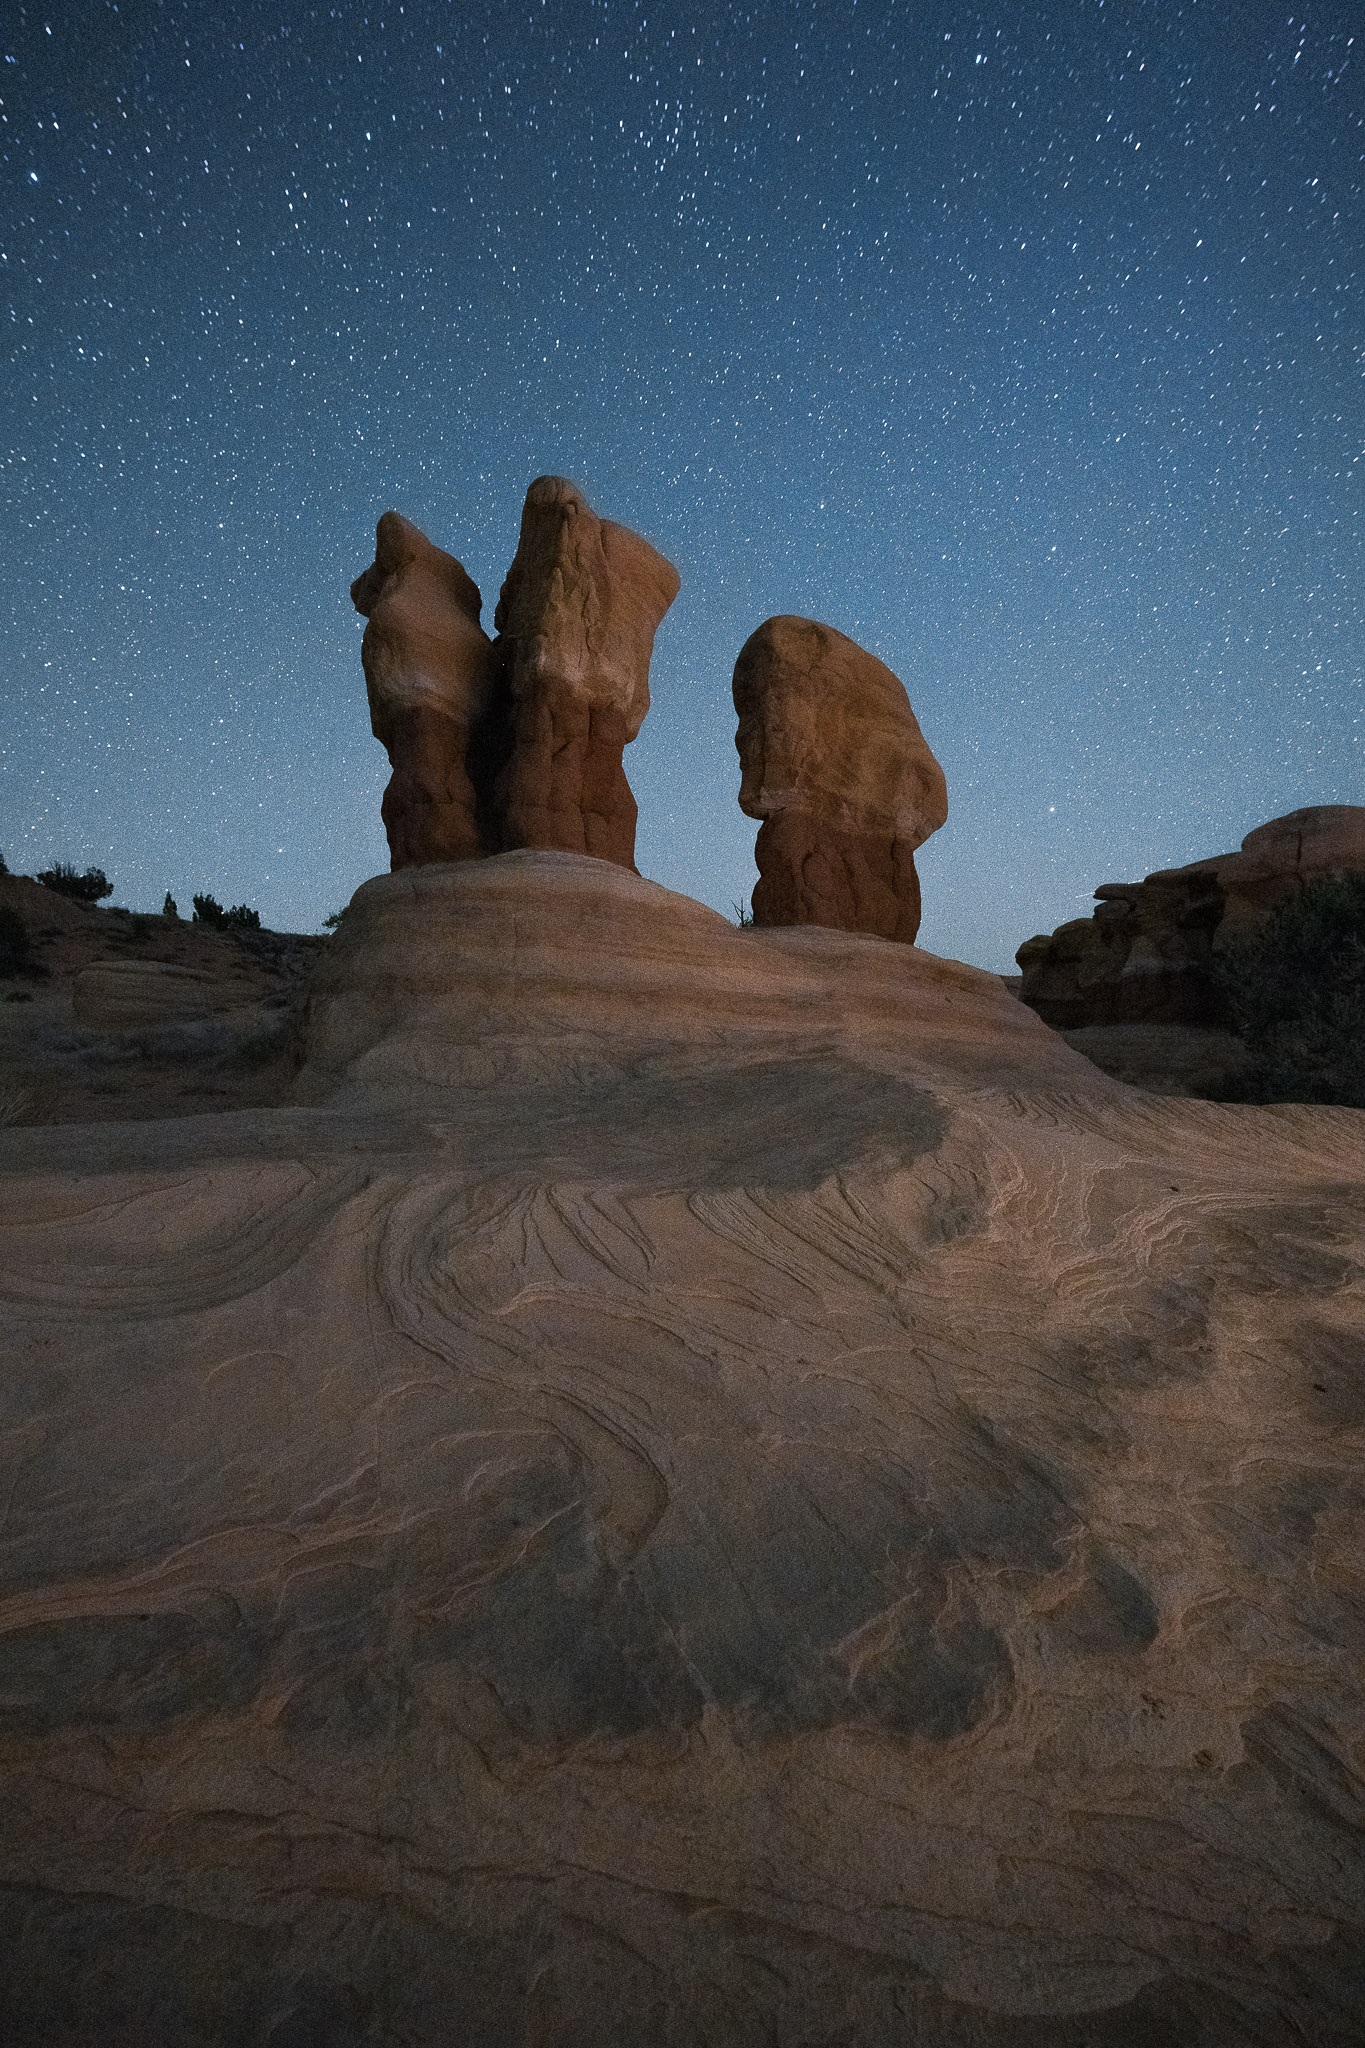
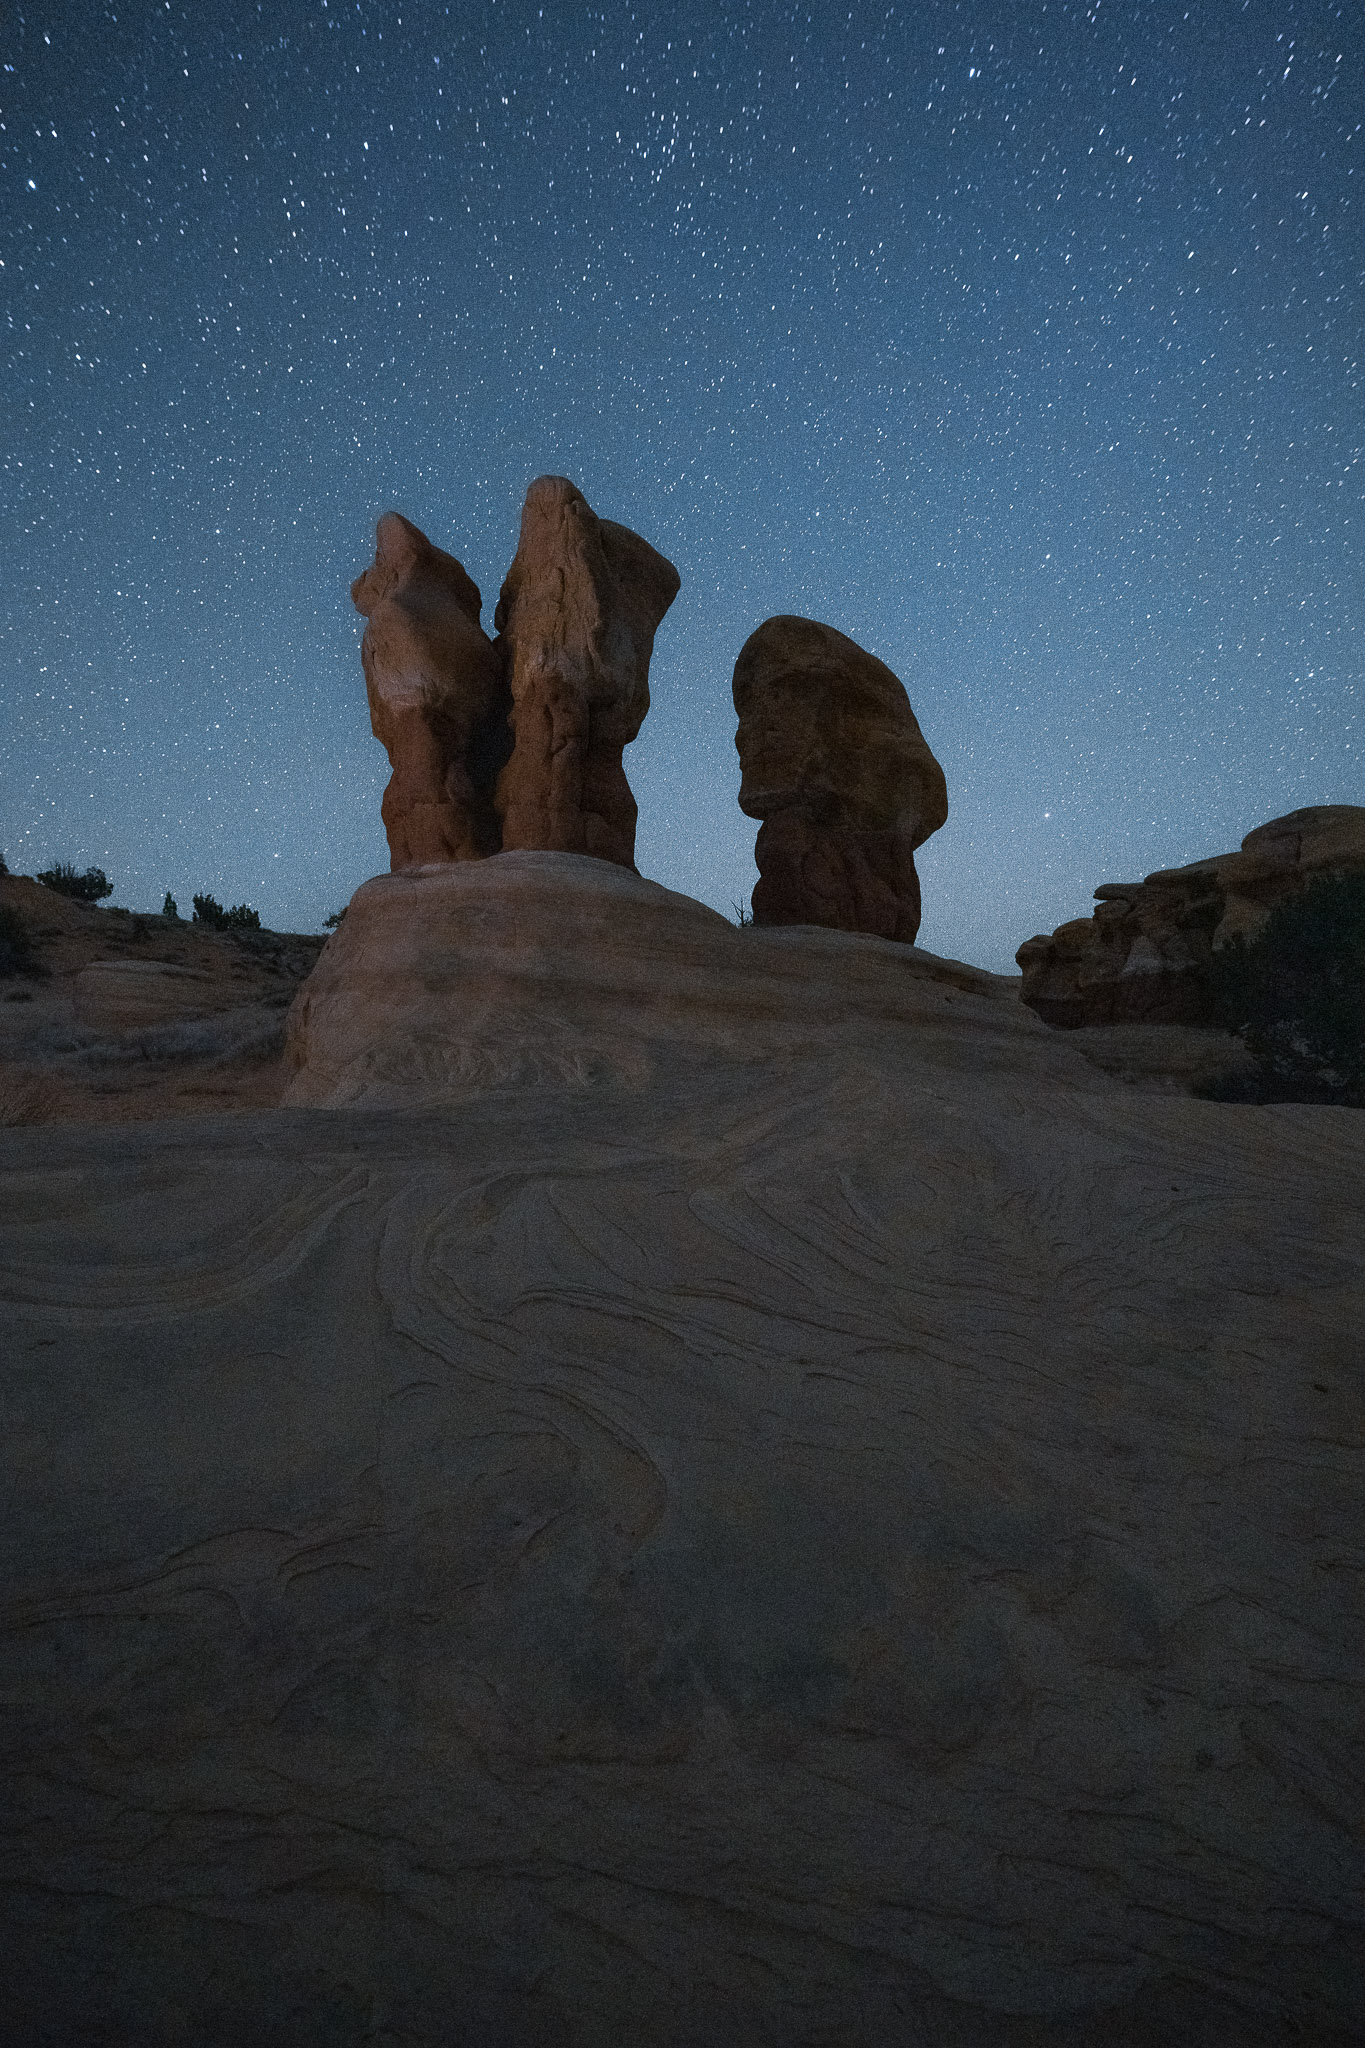
    If you’ve ever tried light painting for Milky Way photography, you may have run into some frustrating issues. Maybe your light’s color temperature didn’t match the scene, or the shadows and highlights somehow looked artificial. Or, perhaps you got a spotlight effect that didn’t cover a wide enough area.

    I have to admit that I didn’t expect to be writing an article about light painting this year. My past attempts with it have always run into the issues I just mentioned – with the end result being photos that looked fake and artificial, distracting from the scene rather than adding to it. The only “light painting” that I would do with any regularity was to wait for the moon to rise and illuminate the landscape!

  • لكن عند رؤية بعض صور درب التبانة المذهلة المرسومة بالضوء من مصورين آخرين، كان من الواضح أن المشكلة كانت تتعلق بمهاراتي، وليس تقنية الرسم بالضوء بشكل عام. لقد كانت مدرجة في قائمتي منذ فترة لتحسين تلك المهارات وإضافة الرسم الضوئي إلى مجموعتي الفنية. على الرغم من أنني بالتأكيد لم أتقنها بعد، إلا أنني التقطت نصيحة كبيرة أدت إلى تحسين جودة الرسم الضوئي الخاص بي بمقدار عشرة أضعاف. أود أن أشاركها معكم اليوم.

    كاميرا Nikon Z8 + Sigma مقاس 14 مم f/1.4 Art @ ISO 1600، 15 ثانية، f/1.4

    But seeing some amazing light-painted Milky Way photos from other photographers, it was clear that the issue was with my skills, not the technique of light painting in general. It’s been on my list for a while to improve those skills and add light painting to my repertoire. While I certainly haven’t mastered it yet, I did pick up a huge tip that improved the quality of my light painting tenfold. I’d like to share it with you today.
    Nikon Z8 + Sigma 14mm f/1.4 Art @ ISO 1600, 15 seconds, f/1.4

  • كانت المشكلات التي كنت أواجهها باستمرار – درجة حرارة اللون غير الصحيحة، والظلال القاسية، وتأثير الضوء – هي كل الأشياء التي كنت أعرف أنه يمكنني إصلاحها باستخدام معدات الإضاءة الفاخرة مثل المواد الهلامية وصندوق الضوء العملاق. لكن ليس لدي أي رغبة في حمل مجموعة كهذه إلى الميدان، خاصة عندما أقوم بتصوير درب التبانة في الريف. عادةً، لا أحمل معي أي معدات إضاءة خاصة باستثناء المصباح الأمامي ومصابيح LED الموجودة على هاتفي، والتي لا تعد مثالية للرسم بالضوء.

    النصيحة التي سأشاركها اليوم تغير ذلك. تم رسم جميع الصور الملتقطة في هذه المقالة باستخدام المصباح اليدوي الأساسي الموجود على هاتفي، دون الحاجة إلى معدلات إضاءة أو أي معدات أخرى. الأمر بسيط: لا توجه ضوءك مباشرة نحو ما تصوره. بدلاً من ذلك، قم بالطلاء في الاتجاه المعاكس، واسمح للمناظر الطبيعية أن تعكس ألوانها بمهارة على موضوعك.

    نيكون Z8 + سيجما 14 مم f/1.4 Art @ ISO 6400، 15 ثانية، f/2.8

    The problems that I kept running into – incorrect color temperature, harsh shadows, and a spotlight effect – were all things I knew I could fix with fancy lighting equipment like gels and a giant softbox. But I have no desire to lug kit like that into the field, especially when I’m doing Milky Way photography in the backcountry. Usually, I don’t carry any special lighting gear apart from my headlamp and the LED on my phone, which are hardly ideal for light painting.

    The tip that I’ll share today changes that. All the photos taken in this article were painted using the basic flashlight on my phone, no light modifiers or other gear required. It’s simple: Don’t point your light directly at what you’re photographing. Instead, paint in the opposite direction, and allow the landscape to subtly reflect its colors onto your subject.
    Nikon Z8 + Sigma 14mm f/1.4 Art @ ISO 6400, 15 seconds, f/2.8

  • فيما يلي مقارنة بين تسليط هاتفي مباشرة على الهدف، مقابل تسليطه خلفي للسماح للمناظر الطبيعية بتوفير مصدر منعكس للضوء: تسليط مصباح يدوي للهاتف على الهدف  تسليط مصباح يدوي للهاتف بعيدًا عن الهدف (Nikon Z8 + Sigma 14mm f/1.4 Art @ ISO 6400، 15 ثانية، f/2.8)

    Here’s a comparison between shining my phone directly at the subject, versus shining it behind me to allow the landscape to provide a reflected source of light:
    Shining phone flashlight onto subjectShining phone flashlight away from subject (Nikon Z8 + Sigma 14mm f/1.4 Art @ ISO 6400, 15 sec., f/2.8)

  • إنه فرق كبير! الألوان والظلال والجودة الشاملة للضوء أفضل بكثير في الصورة الثانية.

    والأكثر من ذلك، أن هذه التقنية مرنة للغاية ويمكن أن تمنحك نتائج مختلفة اعتمادًا على المكان الذي تسلط فيه مصباحك خارج الإطار. لقد وجدت أنه عندما وجهت مصباحي إلى منطقة كبيرة خلفي إلى اليمين، كان بمثابة صندوق إضاءة عملاق من هذا الاتجاه:

    كاميرا Nikon Z8 + Sigma مقاس 14 مم f/1.4 Art @ ISO 6400، 20 ثانية، f/2.8

    It’s a major difference! The colors, shadows, and overall quality of the light are substantially better in the second photo.

    What’s more, this technique is very flexible and can give you different results depending upon where outside the frame you shine your flashlight. I found that when I aimed my flashlight at a large region behind me to the right, it acted like a giant softbox from that direction:
    Nikon Z8 + Sigma 14mm f/1.4 Art @ ISO 6400, 20 seconds, f/2.8

  • وبدلاً من ذلك، يمكنني الحصول على تأثير أكثر تركيزًا من خلال السير للأمام وتوجيه مصباح الهاتف نحو جزء أصغر من المشهد خارج الإطار على يسار الهدف:

    كاميرا Nikon Z8 + Sigma مقاس 14 مم f/1.4 Art @ ISO 6400، 20 ثانية، f/2.8

    يعود الأمر كله إلى نوع المظهر الذي تحاول التقاطه. كلما وقفت إلى الخلف (والمساحة الأكبر من المناظر الطبيعية التي تنيرها خلفك)، كلما ظهر الضوء أكبر وأكثر نعومة في الصورة النهائية.

    Alternatively, I could get a more focused effect by walking forward and pointing the phone’s flashlight at a smaller section of the landscape out of frame to the left of the subject:
    Nikon Z8 + Sigma 14mm f/1.4 Art @ ISO 6400, 20 seconds, f/2.8
    It’s all down to the type of look that you’re trying to capture. The farther back you stand (and the bigger area of the landscape that you illuminate behind you), the larger and softer the light will appear in the final photo.

  • يمكنك إلقاء الضوء على بعض المشاهد الكبيرة بهدوء تام باستخدام هذه الطريقة. أستطيع أن أتخيل تسليط مصباح يدوي ساطع نحو تلة أو جبل طويل خلف الكاميرا، مما يسمح له بالعمل كعاكس ضخم لإضاءة المشهد بأكمله الذي تقوم بتصويره. هناك احتمالات لا نهاية لها.لم تكن طموحاتي في Escalante كبيرة إلى هذا الحد، لكنني كنت سعيدًا برؤية تحسن كبير مقارنة بمحاولاتي السابقة للرسم بالضوء. من المؤكد أن المناظر الطبيعية التي كنت أقوم بتصويرها استفادت من العديد من الصخور والأشجار المختلفة وغيرها من الميزات لتكون بمثابة عاكسات. إذا كنت في منطقة مسطحة مع عدم وجود أي شيء خلف الكاميرا، فأنا متأكد من أن ذلك سيكون أقل فعالية.

    أتمنى أن تجد هذه النصيحة مفيدة لمساعيك في الرسم بالضوء!

    You could illuminate some pretty large scenes quite softly with this method. I can imagine shining a bright flashlight toward a tall hill or mountain behind your camera, allowing it to act as a massive reflector to illuminate the entire scene that you’re photographing. There are endless possibilities.

    My ambitions at Escalante weren’t that grand, but I was happy to see a significant improvement over my previous light painting attempts. Granted, the landscape that I was photographing had the benefit of many different rocks, trees, and other features to act as reflectors. If you’re at a flat landscape with nothing behind the camera, I’m sure it would be less effective.

    I hope that you find this tip useful for your own light painting endeavors!

من فريد ظفور

مصور محترف حائز على العديد من الجوائز العالمية و المحلية في مجال التصوير الفوتوغرافي.