• شرح أغطية الكاميرا تحت الماء
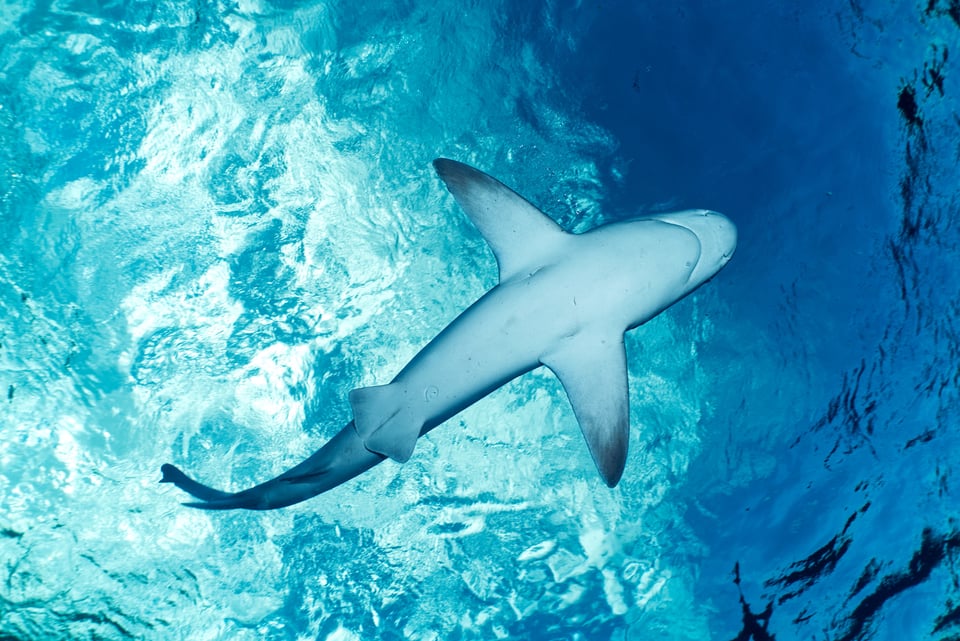
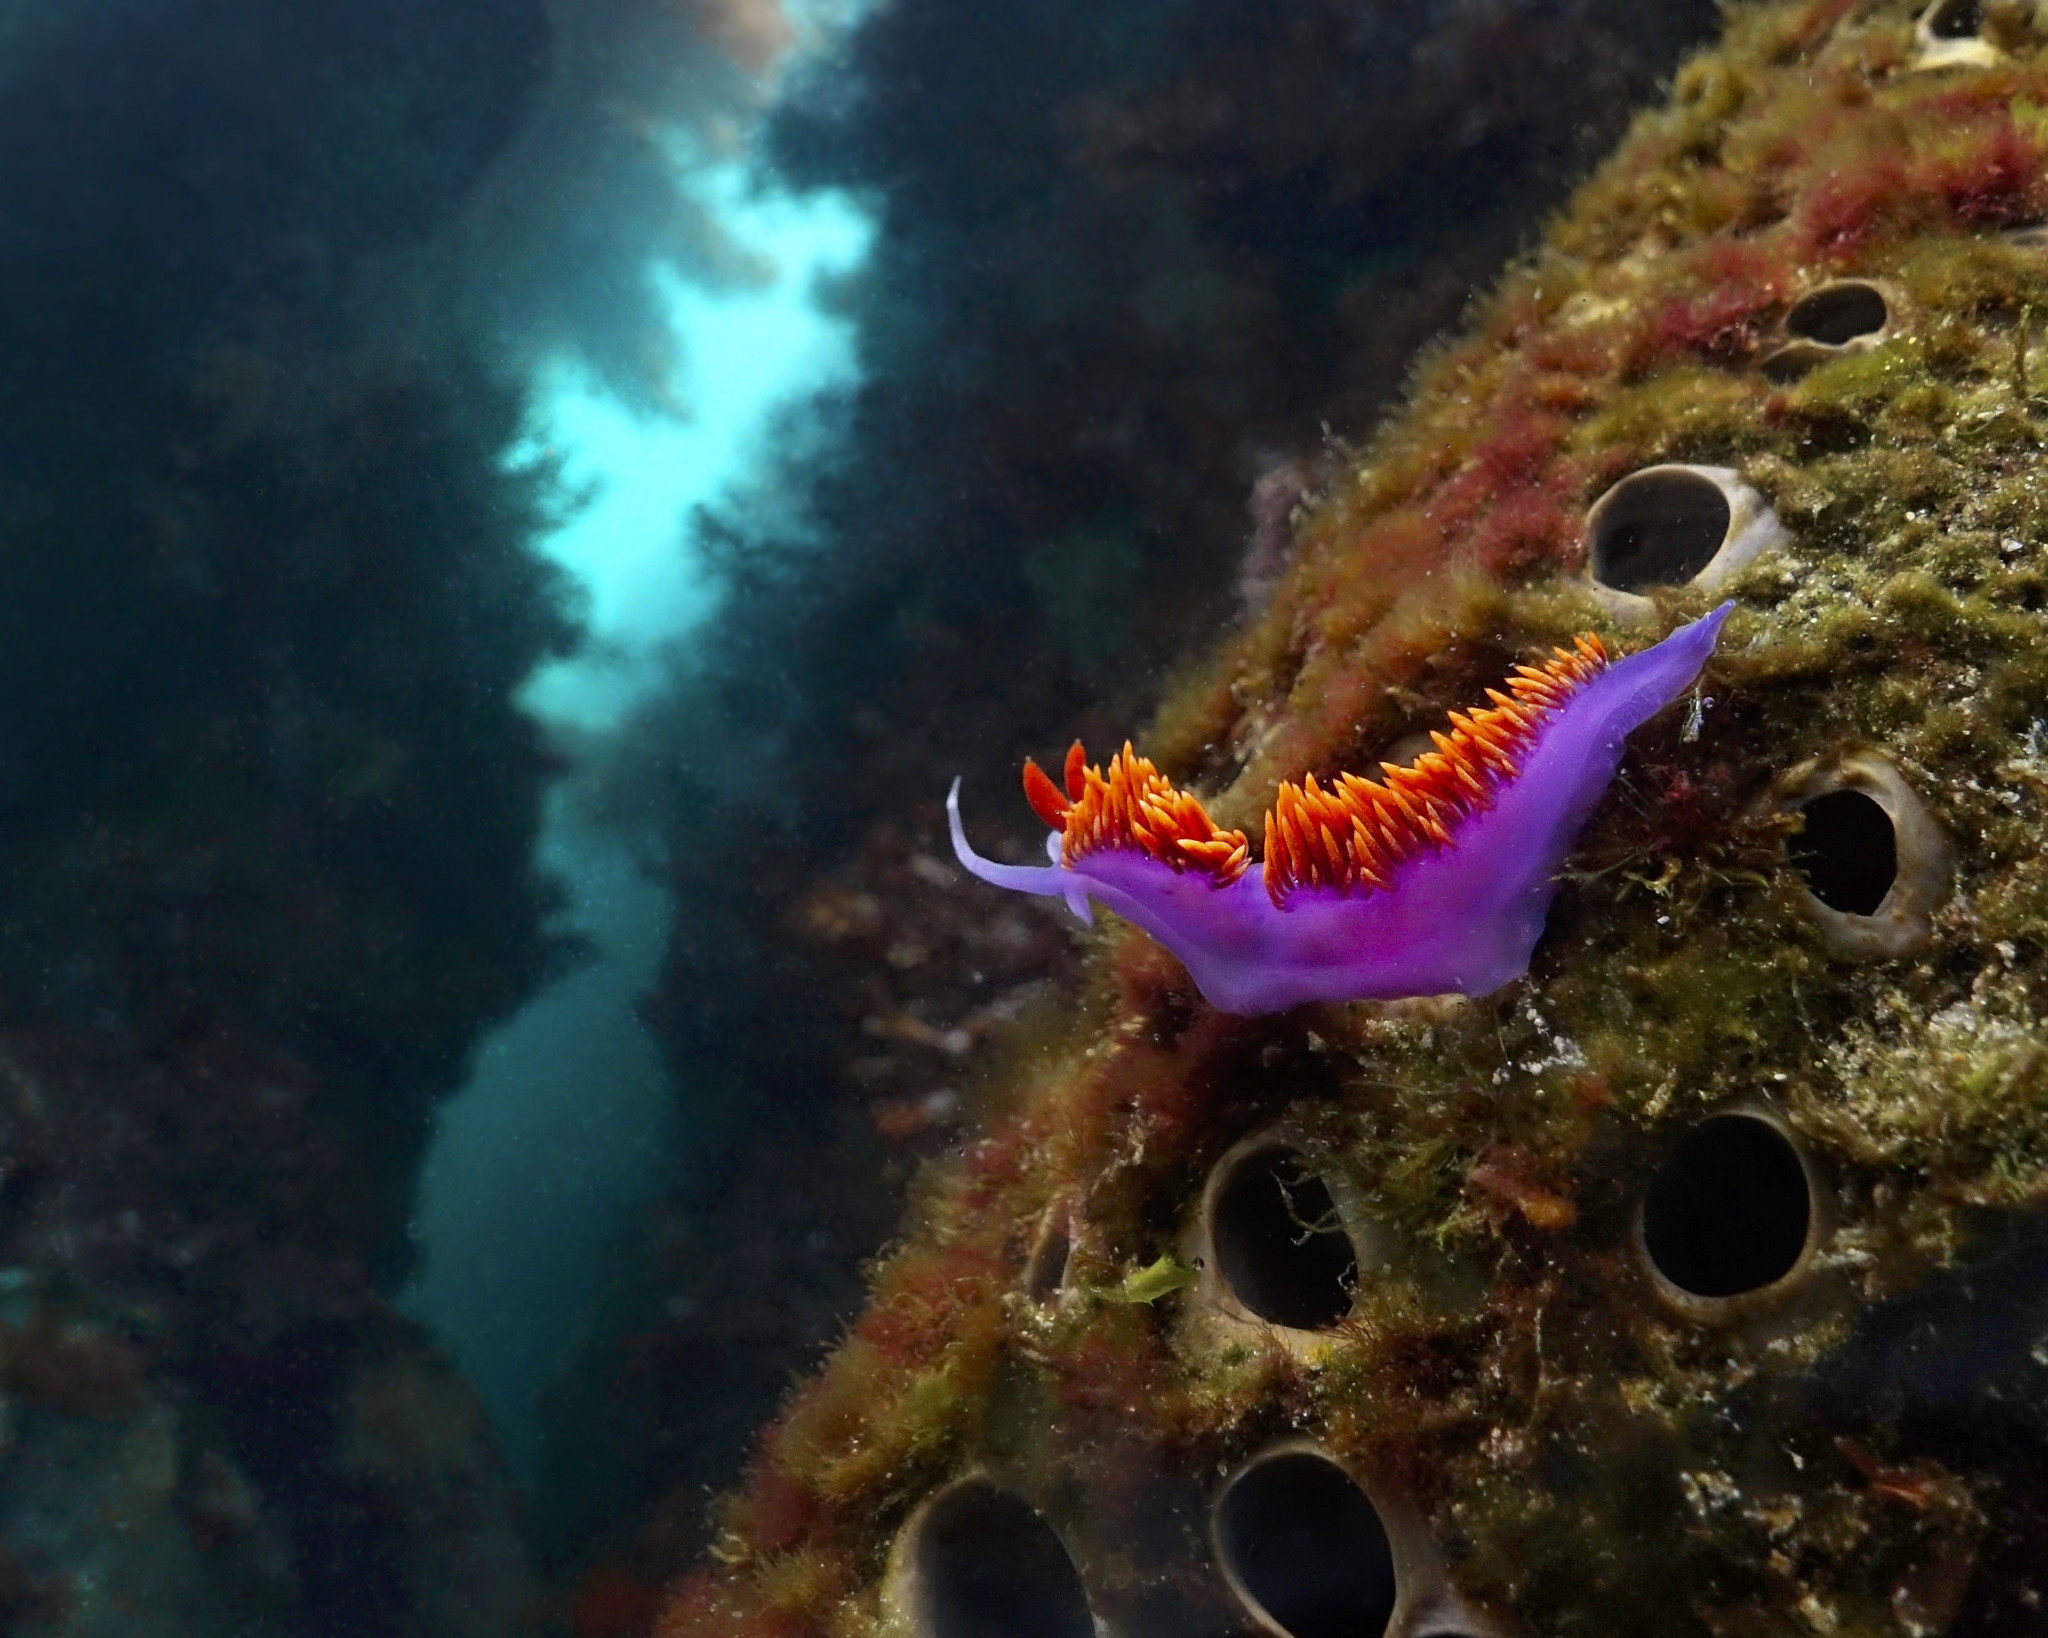
    Underwater Housings for a Camera, Explained

    التصوير الفوتوغرافي تحت الماء مليء بالتحديات التقنية والنفقات الخفية وقصص الرعب المحتملة إذا حدث خطأ ما – ويبدأ كل شيء بغطاء الكاميرا الخاص بك. في هذا الدليل، سأشرح ما تحتاج إلى معرفته حول مبيت الكاميرا تحت الماء، بما في ذلك الملحقات المهمة التي ستحتاجها لوضع معدات التصوير الفوتوغرافي الخاصة بك تحت الماء بأمان.

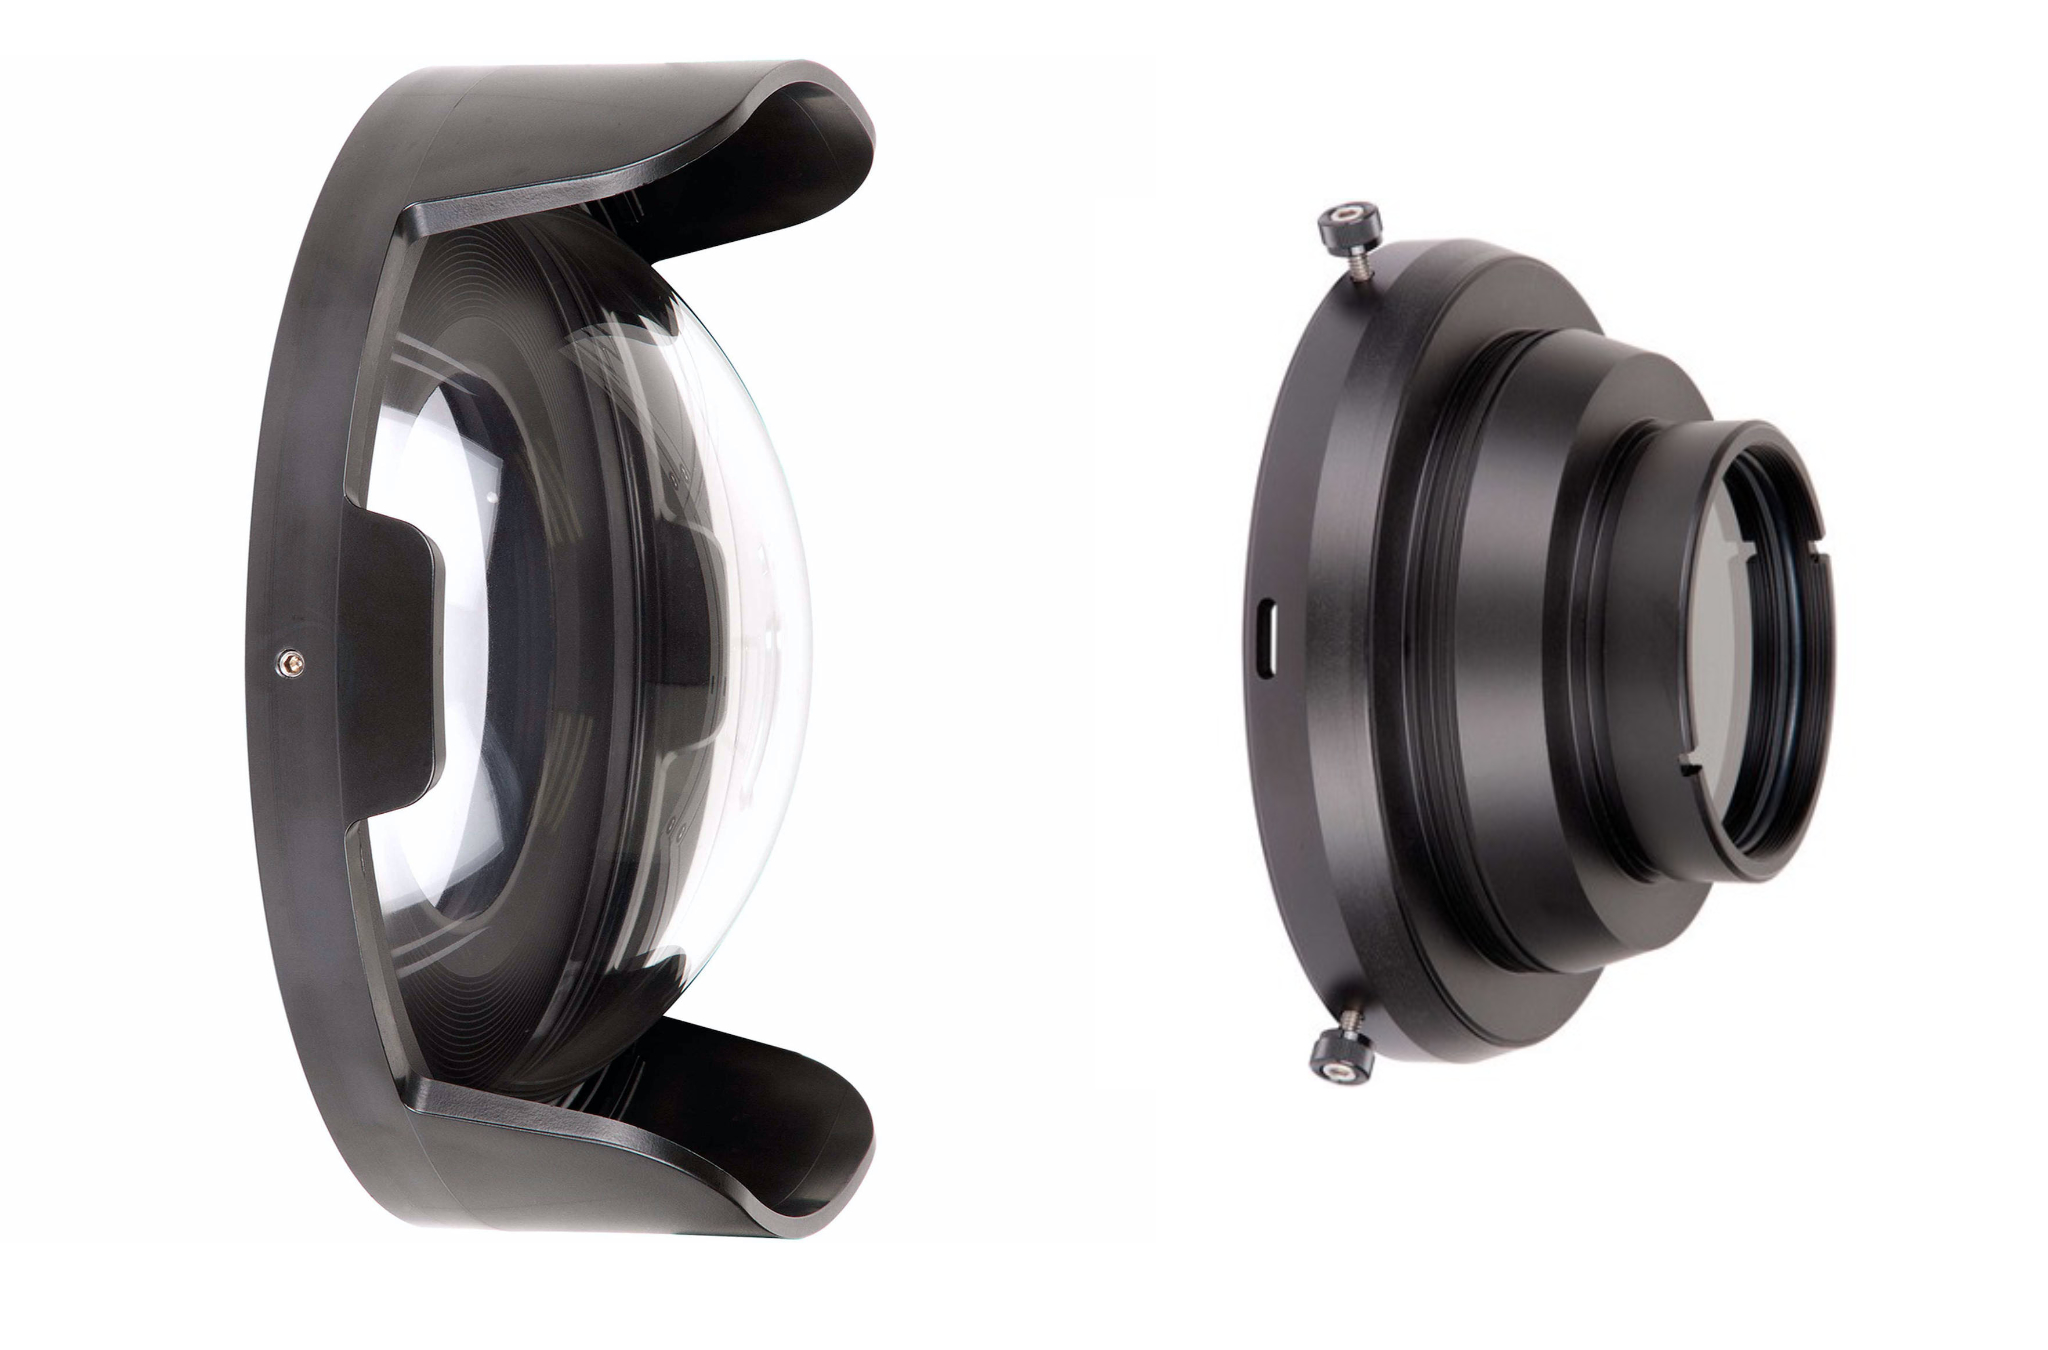
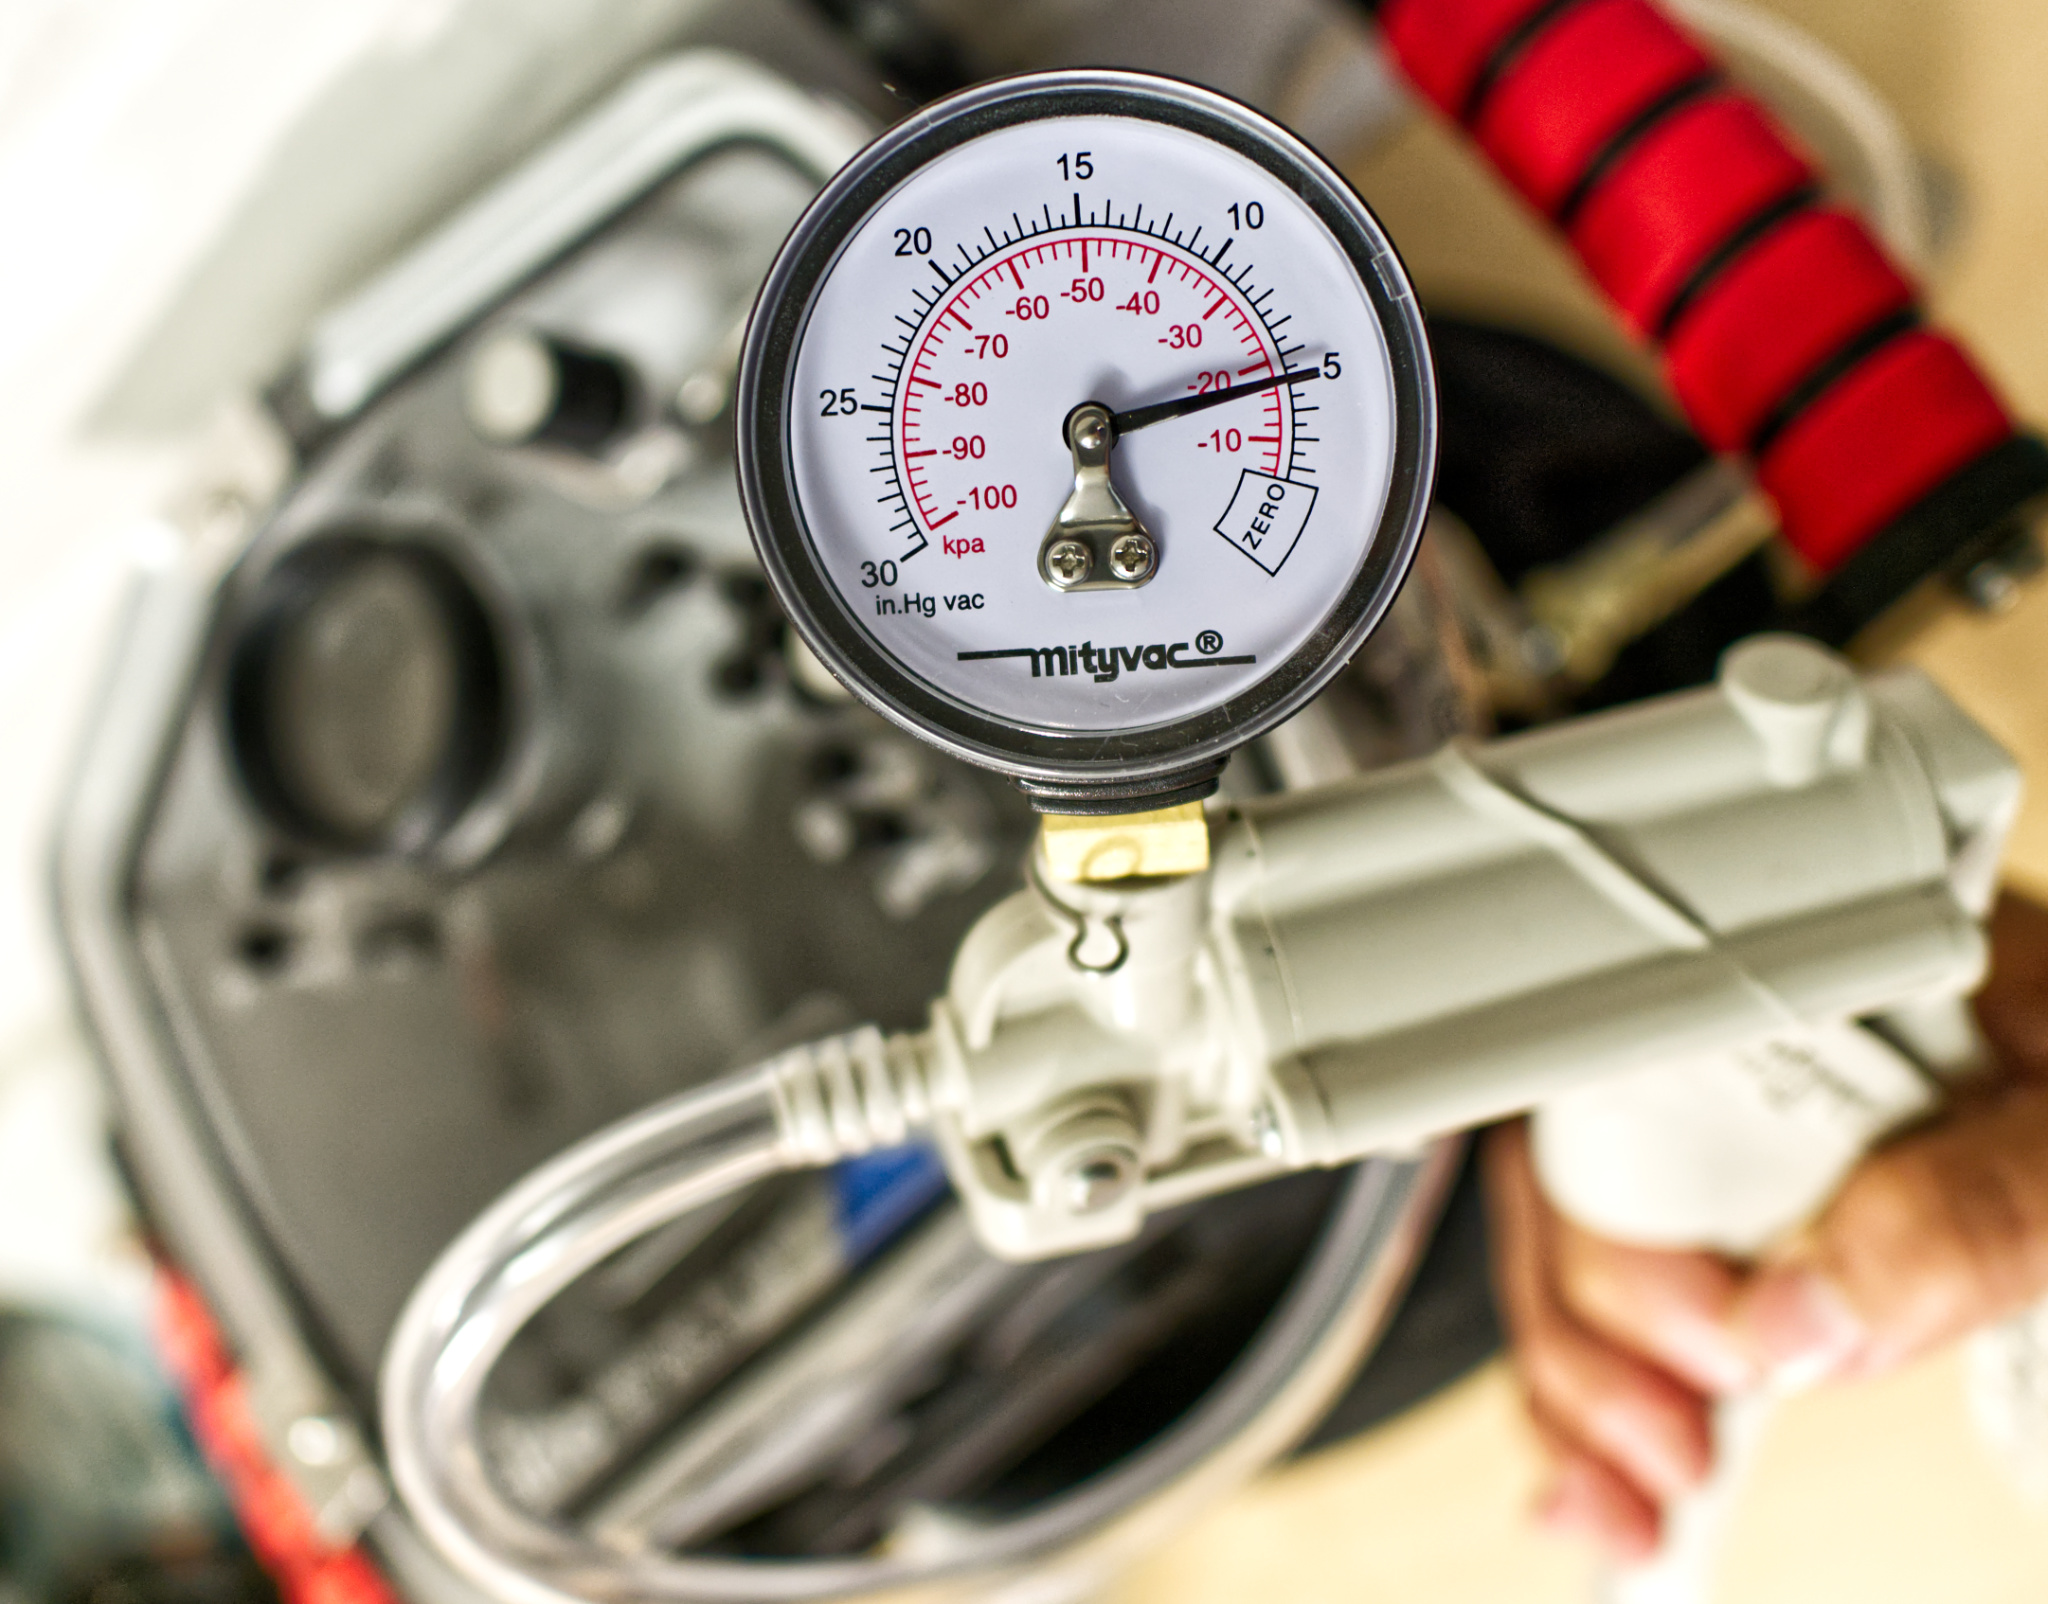
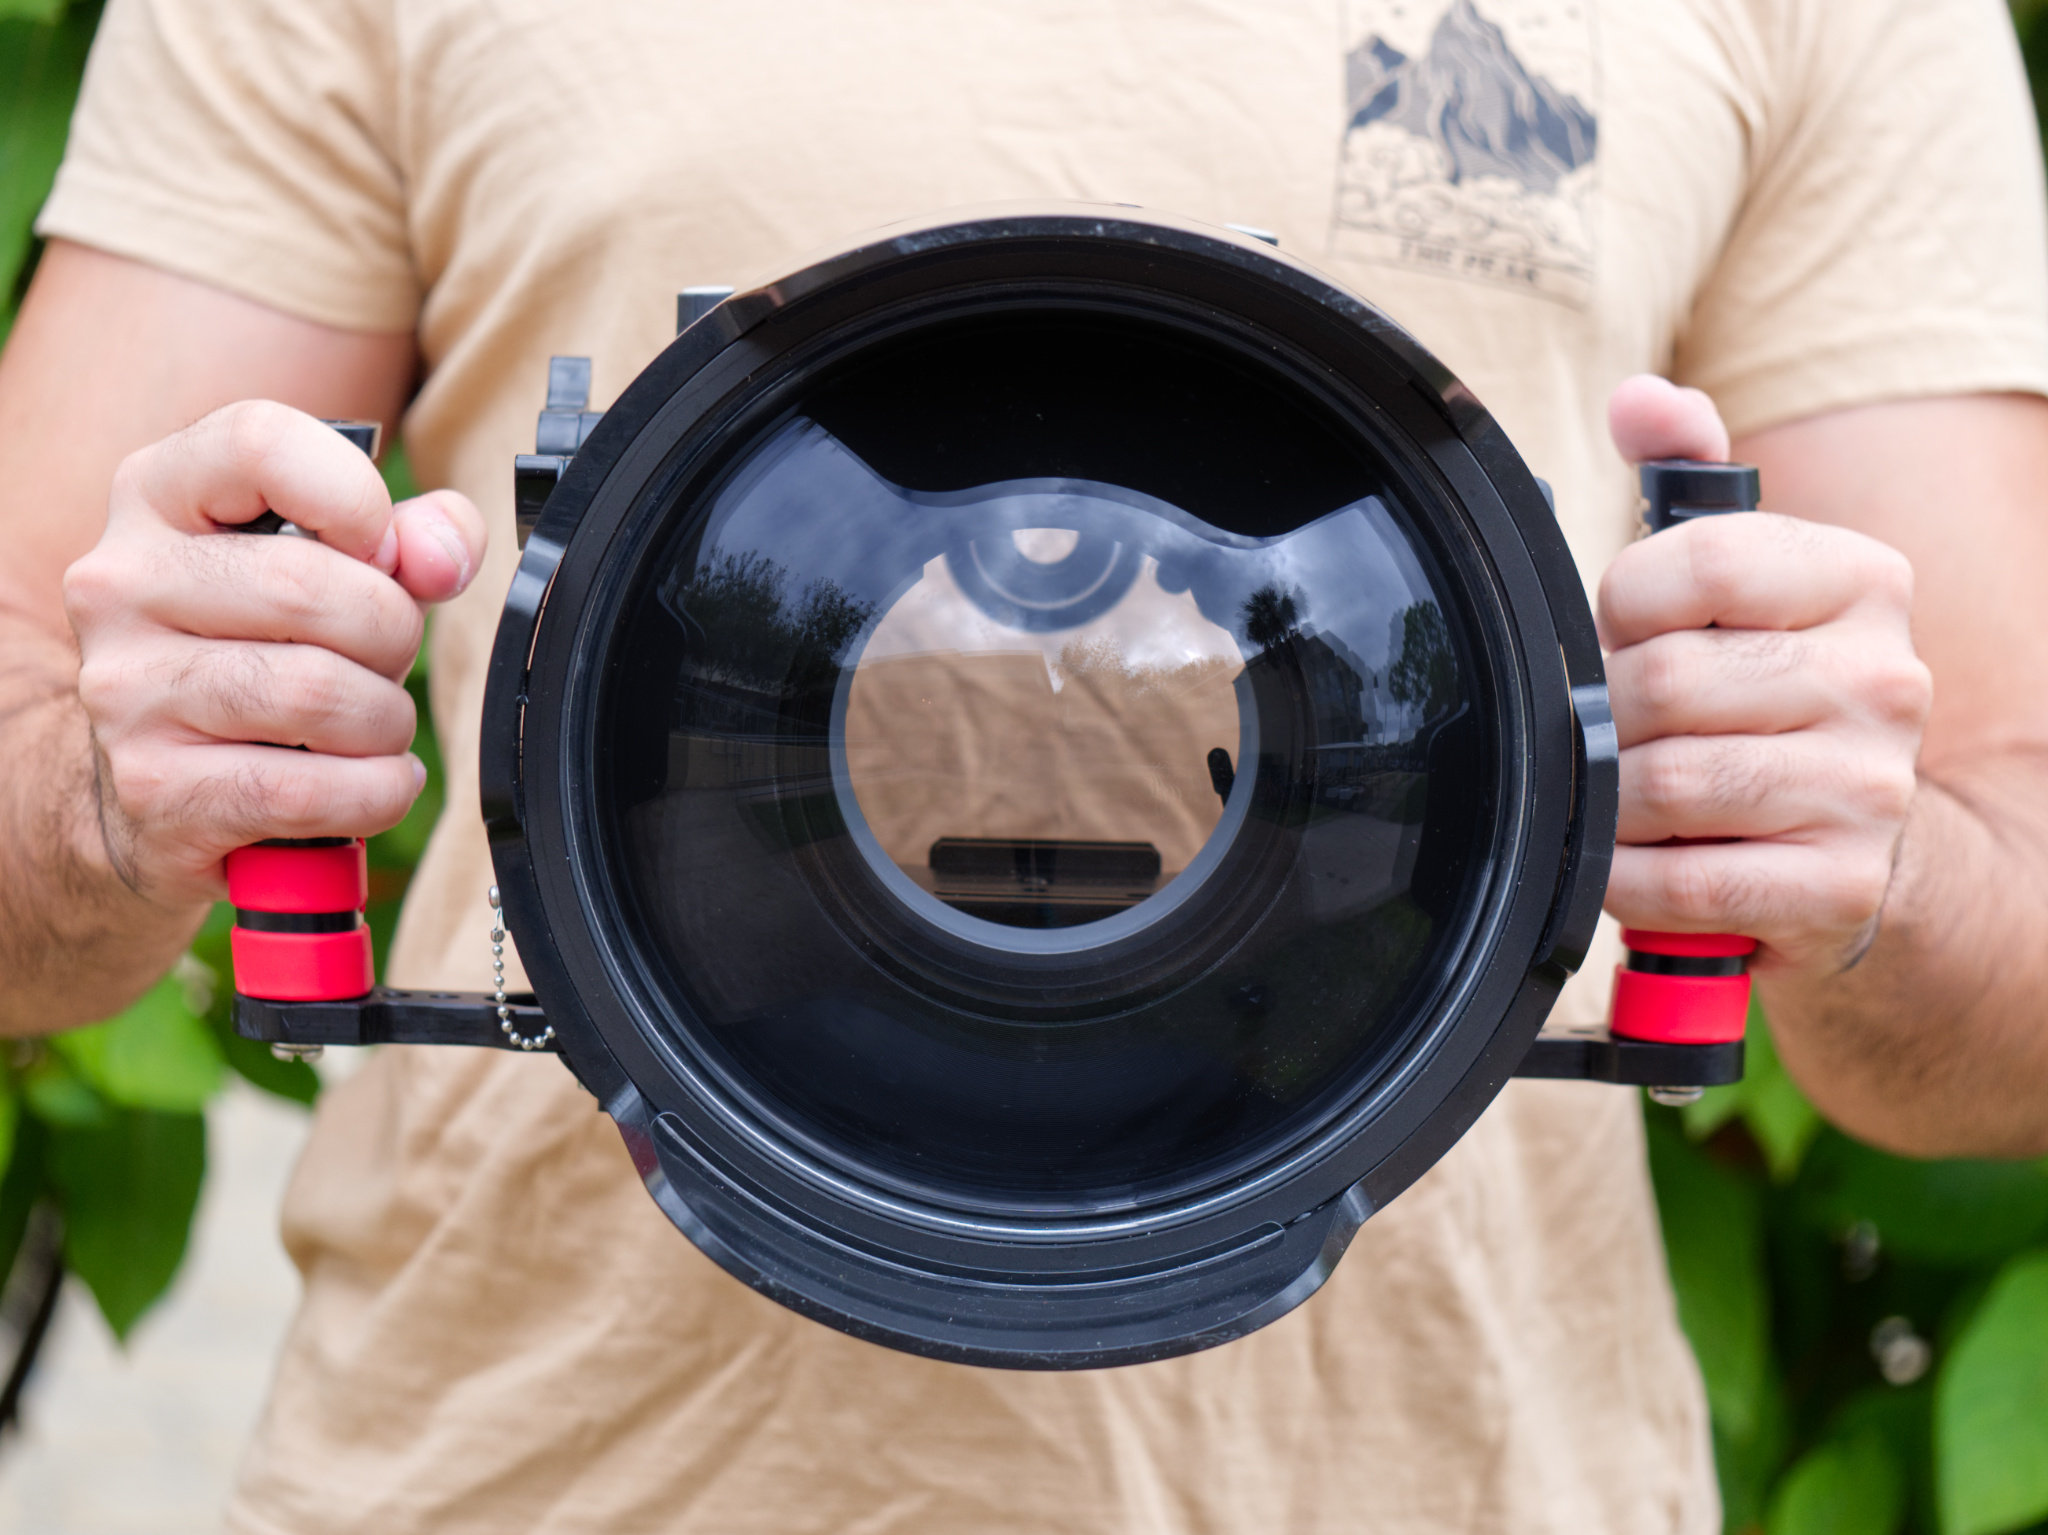
    الخطوة الأولى هي فهم مصطلحات المساكن تحت الماء. بخلاف ذلك، قد يكون من الصعب إجراء بحث أساسي حول هذا الموضوع. على سبيل المثال، ما هو صمام الفراغ أو منفذ القبة؟ كلاهما جزء مهم من غلاف الكاميرا، ولكن لن يبدو أي منهما مألوفًا لمعظم المصورين.

    ولهذا السبب كتبت هذا الدليل. آمل أن أتمكن من المساعدة في جعل العملية أسهل بالنسبة لك مما كانت عليه بالنسبة لي. أدناه، سأغطي جميع مكونات الهيكل تحت الماء والملحقات الضرورية قبل أن تتمكن من أخذ الكاميرا ذات العدسة الأحادية العاكسة (DSLR) أو الكاميرا غير المزودة بمرآة أو الكاميرا المدمجة تحت الماء.

    Underwater photography is filled with technical challenges, hidden expenses, and potential horror stories if something goes wrong – and it all starts with your camera housing. In this guide, I’ll explain what you need to know about underwater housings for your camera, including the crucial accessories you’ll need in order to safely bring your photography equipment underwater.

    The first step is to understand the terminology of underwater housings. Otherwise, it can be tricky to do even basic research on the topic. For example, what’s a vacuum valve or a dome port? Both of them are crucial parts of a camera housing, but neither one will sound familiar to most photographers.

    That’s why I wrote this guide. My hope is that I can help make the process easier for you than it was for me. Below, I’ll cover all the components of an underwater housing and what accessories are necessary before you can take your DSLR, mirrorless, or compact camera underwater.

  • جدول المحتويات

    مقدمةما هو الغلاف تحت الماء؟شرح منافذ العدسة: منافذ القبة مقابل المنافذ المسطحة، حلقات التمديد وترس التكبير/التصغير، الديوبتركيف يمكنك العثور على منفذ العدسة المحدد لعدستك؟ نظام فراغ للتصوير الفوتوغرافي تحت الماء، ملحقات للتعامل مع الكاميرا بسهولة أكبر، أوزان موازنة، مقابض، معدات الفلاش والإضاءة، الحفاظ على مبيت الكاميرا تحت الماء، معدات إضافية، خاتمة

    Table of Contents

  • مقدمة

    قد يكون إحضار كاميرا باهظة الثمن خاصة بك تحت الماء مهمة شاقة. وقد يكون هناك صوت في رأسك يقول “ماذا لو تسرب؟” – لذلك، قد تتساءل عما إذا كانت هناك بدائل لإعداد كامل للسكن تحت الماء. هناك بالتأكيد! أعتقد أن هناك ثلاثة مستويات من معدات التصوير تحت الماء، بنطاقات أسعار وتعقيدات مختلفة:

    التصوير باستخدام كاميرا مقاومة للماء بالفعل جاهزة للاستخداماستخدام مبيت جاهز تحت الماء مع كاميرا مدمجة جيدة، مثل كاميرا سلسلة RX100 من سونيالقيام بالتصوير الفوتوغرافي المتقدم تحت الماء باستخدام كاميرات بدون مرآة/كاميرات DSLR ومبيت مخصص تحت الماء

    في حين أن النوعين الأولين من معدات التصوير تحت الماء يعتبران بديهيين إلى حد ما، فإن النوع الثالث – جلب كاميرا DSLR أو كاميرا بدون مرآة تحت الماء – هو الذي يتطلب بعض البحث. تعتبر المساكن المخصصة تحت الماء لمثل هذه الكاميرات كبيرة ومعقدة ومكلفة. تحتاج عادةً إلى شراء المكونات المختلفة بشكل منفصل وتجميع هيكل العمل تحت الماء بنفسك.

    لسوء الحظ، التصوير تحت الماء ليس رخيصا. إنها أغلى بثلاث مرات تقريبًا من التصوير الفوتوغرافي العادي، ومع زيادة جودة المعدات، يزداد السعر أيضًا.

    قد تميل إلى محاولة العثور على أرخص طريق ممكن، ولكن هذا شيء ستندم عليه بالتأكيد. إذا كان هناك شيء واحد فقط يمكنك استخلاصه من هذه المقالة، فليكن هذا: لا تبخس ثمن مسكنك تحت الماء! من المؤكد أن هناك طرقًا لالتقاط صور تحت الماء بميزانية محدودة (راجع مقالتي حول التصوير الفوتوغرافي الرخيص تحت الماء)، ولكن اختيار مسكن منخفض الجودة ليس واحدًا منها.

    من ناحية، إذا تسرب الغلاف الرخيص تحت الماء، فستحتاج فجأة إلى استبدال الكاميرا، مما يجعلها مسكنًا مكلفًا للغاية. حتى إذا لم يتسرب، فستكون هناك مشكلات أخرى – الزجاج سهل الخدش، والانعكاسات السيئة، وزر الغالق عالق (تحدث عن اللقطات المفقودة)، والواجهة الصعبة، والمزيد. لقد واجهت كل هذه شخصيا! يمكنني أن أكتب مقالًا كاملاً عن سبب عدم شراء معدات رخيصة تحت الماء. ولكن دعونا ندخل في الأشياء الجيدة الآن.

    في هذه المقالة، سأتناول المواضيع التالية:

    العناصر اللازمة لإكمال مبيتك تحت الماء، منافذ العدسات وكيفية عملها، الحفاظ على مبيتك مقاومًا للماء باستخدام نظام تفريغ، كيفية الحفاظ على مبيتك لمنع الفيضانات، معدات إضافية يمكنها تحسين جهازك تحت الماء

    وبعد ذلك سأحاول الإجابة على أي أسئلة في قسم التعليقات إذا كانت لديكم.

    Introduction

    Bringing an expensive camera of yours underwater can be a daunting task. And there might be a voice in your head saying “what if it leaks?” – so, you may be wondering if there are alternatives to a full underwater housing setup. There certainly are! I consider there to be three levels of underwater photography equipment, with different price ranges and complexity:

    1. Shooting with a camera that’s already waterproof out-of-the-box
    2. Using a ready-made underwater housing with a good compact camera, like a Sony RX100-series camera
    3. Doing advanced underwater photography with mirrorless/DSLR cameras and a custom underwater housing

    Whereas the first two types of underwater photography equipment are fairly intuitive, it’s the third one – bringing a DSLR or mirrorless camera underwater – that takes some research. Dedicated underwater housings for such cameras are large, complex, and expensive. You usually need to buy the various components separately and assemble a working underwater housing yourself.

    Unfortunately, underwater photography is not cheap. It’s about 3x as expensive as regular photography, and as the gear increases in quality, so too does the price.

    You may be tempted to try to find the cheapest route possible – but that’s something you’ll almost certainly regret. If there is only one thing you take away from this article, let it be this: don’t cheap out on your underwater housing! There certainly are ways to take underwater photos on a budget (see my article on cheap underwater photography), but going with a low-quality housing is not one of them.

    On one hand, if the cheap underwater housing leaks, suddenly you’ll need to replace your camera, making it a very expensive housing. Even if it doesn’t leak, it will have other issues – easily scratched glass, bad reflections, stuck shutter button (talk about missed shots), challenging interface, and more. I’ve experienced all of these personally! I could write a whole article just on why you shouldn’t buy cheap underwater gear. But let’s get into the good stuff now.

    In this article, I’m going to cover the following topics:

    • The items necessary to complete your underwater housing
    • Lens ports and how they work
    • Keeping your housing watertight with a vacuum system
    • How to maintain your housing to prevent flooding
    • Additional gear that can improve your underwater rig

    And then I’ll try to answer any questions in the comments section if you have them.

  • ما هو السكن تحت الماء؟

    كما يوحي الاسم، فإن غلاف الكاميرا تحت الماء هو ببساطة غطاء مقاوم للماء يسمح لك بمواصلة تشغيل الكاميرا تحت الماء. عادةً ما يتم تصميم العلب لطراز معين من الكاميرا. وحتى في هذه الحالة، قد لا يكون الغلاف جاهزًا للعمل بنسبة 100% ويسمح بالوصول إلى كل زر وقرص في الكاميرا. وكلما زادت عملياتها، كلما زادت تكلفتها.

    في عالم مثالي، يمكنك شراء مسكن تحت الماء، وسوف يظهر، ويمكنك فقط وضع الكاميرا الخاصة بك في الداخل وتكون جاهزًا للتصوير بعيدًا. لسوء الحظ، ليس هذا هو الحال مع الأجهزة الأكثر تقدمًا للحصول على كاميرات أفضل.

    تمامًا كما هو الحال عند شراء هيكل الكاميرا، فإنه لا يأتي دائمًا مع عدسة، وعندما تشتري غطاءًا تحت الماء، فإنه لا يأتي بالضرورة مع منفذ عدسة (المزيد حول هذا بالضبط قريبًا). وذلك لأن منفذ القبة الذي تحتاجه يعتمد على العدسة التي ستستخدمها. هناك مكونات إضافية مهمة للسكن تحت الماء يجب عليك الحصول عليها أيضًا.

    لذا أعتقد أن السؤال الأفضل هو، ما هو كل ما يشكل جزءًا من السكن تحت الماء، وما الذي تحتاج بالفعل إلى شرائه؟ وهذا ما سأغطيه بعد ذلك. كل شيء يبدأ بمنفذ العدسة.

    What Is an Underwater Housing?

    As the name implies, an underwater housing for your camera is simply a waterproof case that allows you to keep operating the camera underwater. Usually, housings are built for a specific model of camera. Even then, the housing may not be 100% operational and allow access to every button and dial on the camera. The more operation it has, the more expensive it tends to be.

    In a perfect world, you would buy an underwater housing, it would show up, and you could just stick your camera inside and be ready to shoot away. Unfortunately, that is not the case with more advanced rigs for better cameras.

    Similarly to how when you buy a camera body, it doesn’t always come with a lens, when you buy an underwater housing, it doesn’t necessarily come with a lens port (more on exactly what that is soon). This is because the dome port you need depends on what lens you will use. There are additional important components to the underwater housing you must also get.

    So I guess a better question would have been, what all is part of an underwater housing, and what do you actually need to buy? That’s what I’ll cover next. It all starts with the lens port.

  • شرح منافذ العدسة

    تمامًا كما يتم توصيل العدسة بالكاميرا، يتم توصيل منفذ عدسة للتصوير الفوتوغرافي تحت الماء بالجزء الأمامي من المبيت تحت الماء. إنها قطعة ضرورية من المعدات التي يجب شراؤها بشكل منفصل. بدون منفذ العدسة، سيكون هناك ثقب كبير في الجزء الأمامي من غلاف الكاميرا. لا أعتقد أن هذا مقاوم للماء جدًا!

    عادةً ما يكون العثور على منفذ العدسة المناسب هو الجزء الأصعب في تصور إعداد التصوير الفوتوغرافي تحت الماء. وذلك بسبب وجود الكثير من العدسات المتوفرة في السوق، والعديد من العلب تحت الماء في السوق، ومنافذ العدسات المختلفة المتاحة. ناهيك عن أن منفذ عدسة واحد يمكن أن يعمل أحيانًا مع عدة عدسات مختلفة – في حين أن منافذ العدسات الأخرى غير متوافقة مع أغلفة معينة.

    لذلك، اسمحوا لي أن أتناول بعض الأسئلة والاعتبارات الأكثر شيوعًا بعد ذلك.

    Lens Ports Explained

    Just like how a lens attaches to your camera, a lens port for underwater photography attaches to the front of the underwater housing. It’s a necessary piece of equipment that must be purchased separately. Without a lens port, there would be a massive hole on the front of the camera housing. I don’t think that’s very waterproof!

    Finding the right lens port is usually the hardest part of conceptualizing your underwater photography setup. This is because there are so many lenses out there, multiple underwater housings on the market, and different lens ports available. Not to mention that one lens port can sometimes work for multiple different lenses – whereas other lens ports are incompatible with certain housings.

    So, let me go through some of the most common questions and considerations next.

  • 1. منافذ القبة مقابل المنافذ المسطحة

    هناك نوعان رئيسيان من منافذ العدسات للتصوير الفوتوغرافي تحت الماء: منافذ القبة والمنافذ المسطحة.

    تتميز منافذ القبة بواجهة مستديرة “تشبه القبة” وتستخدم للتصوير الفوتوغرافي بزاوية واسعة. من ناحية أخرى، فإن الجزء الأمامي من المنافذ المسطحة يكون مسطحًا بشكل غير مفاجئ. يتم استخدامها للتصوير الفوتوغرافي بأطوال بؤرية أضيق – والتي تعني دائمًا تقريبًا الصور الكلية للتصوير الفوتوغرافي تحت الماء.

    منفذ القبة (يسار) للتصوير بزاوية واسعة مقابل منفذ مسطح (يمين) للتصوير الماكرو

    نظرًا لطبيعة تأثير الماء على الضوء، وتحديدًا عند السطح البيني بين الماء والهواء، يعمل منفذ العدسة كعنصر إضافي للعدسة. إنه يلعب دورًا رئيسيًا في النظام البصري وجودة الصورة لصورك تحت الماء.

    إذا سبق لك أن ذهبت إلى حوض أسماك أو نظرت إلى أي حوض للأسماك، فقد تكون على دراية بكيفية ظهور الأشياء مشوهة جدًا خلف الزجاج المسطح. ويرجع ذلك إلى الطريقة التي ينكسر بها الزجاج المسطح الضوء. لا تعتبر واجهة الماء والهواء المسطحة مثالية للتصوير الفوتوغرافي تحت الماء بسبب الانكسار الشديد. ويتجلى ذلك في الصور من خلال الانحراف اللوني والتشويه الشديد. تصبح المشكلة بارزة بشكل متزايد مع العدسات الأوسع.

    ولهذا السبب يتم استخدام منافذ القبة للتصوير الفوتوغرافي بزاوية واسعة تحت الماء – فهي تقاوم الانكسار الناتج عن الزجاج المسطح أو الأكريليك. ربما في حوض السمك، يمكنك أن تتذكر وضع رأسك في فتحة عرض صغيرة على شكل قبة، حيث يمكنك الحصول على مجال رؤية أوسع بكثير، وتبدو الأسماك أصغر حجمًا وأقل تشوهًا. هذه هي الفكرة وراء منافذ القبة أيضًا. تعمل هذه العدسات على تحسين الحدة والتشوه والانحراف اللوني وغيرها من المشكلات الناجمة عن الانكسار بشكل كبير عند استخدام العدسات ذات الزاوية الواسعة.

    كقاعدة عامة، يجب استخدام أي عدسة ذات طول بؤري أوسع من مكافئ الإطار الكامل مقاس 35 مم مع منفذ قبة، في حين أن المنافذ المسطحة أفضل للتصوير الفوتوغرافي الماكرو.

    ربما تتساءل عما إذا كان بإمكانك استخدام منفذ القبة لتصوير الماكرو أيضًا. الجواب هو نعم – ولكن سيتم تقليل تكبير صورك إلى حد ما. والأهم من ذلك، أنه من السهل خدش القبة الباهظة الثمن لمنفذ القبة إذا اقتربت من أهدافك للتصوير الفوتوغرافي الماكرو. ولهذا السبب يتم استخدام المنافذ المسطحة بشكل أكثر شيوعًا لالتقاط الصور القريبة تحت الماء.

    بالنظر إلى كل ذلك، آمل أن تتمكن من رؤية مدى أهمية تجميع السكن المناسب تحت الماء وليس مجرد شراء واحد دون تفكير. منفذ العدسة ليس مجرد قطعة مقاومة للماء من الزجاج الشفاف أو الأكريليك – إنه عنصر أمامي جديد لعدستك، ويجب التعامل معه بنفس القدر من الأهمية.

    1. Dome Ports vs Flat Ports

    There are two main types of lens ports for underwater photography: dome ports and flat ports.

    Dome ports have a rounded, “dome-like” front and are used for wide-angle photography. On the other hand, the front of flat ports are, unsurprisingly, flat. They’re used for photographing with narrower focal lengths – which, for underwater photography, almost always means macro photos.
    Dome port (left) for wide angle photography vs. a flat port (right) for macro photography
    Due to the nature of how water affects light, specifically at the interface between water and air, the lens port acts as an extra lens element. It plays a major role in the optical system and image quality of your underwater photos.

    If you have ever been to an aquarium or looked into any fish tank, you may be familiar with how objects can look very distorted behind flat glass. This is because of the way flat glass refracts light. A flat water-air interface is not ideal for underwater photography because of the severe refraction. In photos, this is evident with chromatic aberration and severe distortion. The issue becomes increasingly prominent with wider lenses.

    That’s why dome ports are used for wide-angle underwater photography – they combat the refraction caused by flat glass or acrylic. Maybe at an aquarium you can remember sticking your head into a little dome-shaped viewing hole, inside which you get a much wider field of view, and the fish look smaller and less distorted. This is the idea behind dome ports, too. They drastically improve the sharpness, distortion, chromatic aberration, and other refraction-induced issues when using wide-angle lenses.

    As a rule of thumb, any lens with a focal length wider than a 35mm full-frame equivalent should be used with a dome port, while flat ports are better for macro photography.

    You may be wondering if you can use a dome port for macro photography, too. The answer is yes – but the magnification of your photos will be reduced somewhat. Even more importantly, it’s easy to scratch the expensive dome of the dome port if you get close to your subjects for macro photography. This is why flat ports are more commonly used for close-up underwater photos.

    Given all that, I hope you can see how important it is to put together the right underwater housing and not just buy one without thinking. The lens port isn’t just a waterproof piece of clear glass or acrylic – it’s a new front element for your lens, and it should be treated just as importantly as one.

  • 2. حلقات التمديد ومعدات التكبير

    في بعض الأحيان، لا يتوفر منفذ القبة المثالي للعدسة التي تريد استخدامها تحت الماء. بعد كل شيء، هناك عدسات في السوق أكثر بكثير من منافذ العدسات. المشكلة الأكبر هي أن العدسة قد تبرز كثيرًا داخل القبة (خاصة إذا كانت عدستك تحتوي على تكبير خارجي أو تركيز خارجي).

    هل تستسلم وتستخدم عدسة مختلفة في تلك المرحلة؟ مُطْلَقاً! بدلاً من ذلك، يمكنك استخدام حلقات التمديد لدفع منفذ العدسة إلى الأمام لاستيعاب أي عدسة تقريبًا. عادةً، على الموقع الإلكتروني لشركة الإسكان تحت الماء، يمكنك العثور على معلومات حول حلقات التمديد المناسبة للعدسات المختلفة.

    ضع في اعتبارك أيضًا أنك ستحتاج إلى معدات إضافية حتى تتمكن من استخدام أي من حلقات التكبير/التصغير أو التركيز على عدستك. يجب عمومًا شراء هذا الترس بشكل منفصل عن منفذ العدسة نفسه، وبما أن ذلك يعتمد على العدسة المحددة التي تستخدمها، فهو شيء آخر يجب عليك شراؤه بعناية. مرة أخرى، تحقق من التوصيات الموجودة على الموقع الإلكتروني لشركة الإسكان للكاميرات تحت الماء.

    2. Extension Rings and Zoom Gear

    Sometimes, the perfect dome port doesn’t exist for the lens you want to use underwater. After all, there are many more lenses on the market than lens ports. The biggest issue is that the lens may protrude too far into the dome (especially if your lens has an external zoom or external focusing).

    Do you just give up and use a different lens at that point? Not at all! Instead, you can use extension rings to push the lens port further forward to accommodate almost any lens. Usually, on the underwater housing company’s website, you can find information on the right extension rings for various lenses.

    Also keep in mind that you’ll need extra gear in order to use any of the zoom or focusing rings on your lens. This gear generally needs to be bought separately from the lens port itself, and since it depends on the exact lens you’re using, it’s another thing you need to buy carefully. Again, check the recommendations on the underwater camera housing company’s website.

  • 3. الديوبتر

    هناك عنصر آخر (لا يقصد التورية) يلعب هنا. لكي تعمل بصريات بعض العدسات بشكل صحيح تحت الماء، فإنها تتطلب ديوبترًا إضافيًا. السبب البصري هو أن العدسة قد لا تركز عادةً بشكل قريب بما يكفي للتركيز على الصورة المعروضة بواسطة منفذ القبة (وهي في الحقيقة الطريقة التي يعمل بها منفذ القبة في نهاية اليوم).

    على وجه التحديد، يسمح الديوبتر لعدستك بالتركيز بشكل أقرب. هذا أمر ضروري بشكل أقل شيوعًا، لكنه قد يأتي! ستحتاج إلى البحث عن عدستك مسبقًا للاستخدام تحت الماء. من السهل عادةً العثور على معلومات حول ما إذا كان الأمر يتطلب الديوبتر أم لا.

    3. Diopters

    There is one more element (no pun intended) at play here. For the optics of some lenses to function properly underwater, they require an additional diopter. The optical reason is that the lens may not usually focus close enough to focus on the image projected by the dome port (which is really how the dome port works at the end of the day).

    Specifically, the diopter allows your lens to focus closer. This is less commonly necessary, but it may come up! You’ll want to research your lens ahead of time for underwater use. It’s usually easy to find information about whether it will require a diopter or not.

  • 4. كيف يمكنك العثور على منفذ العدسة المحدد لعدستك؟

    إن فكرة العثور على منفذ العدسة المناسب، وحلقات التمديد، ومعدات التكبير/التصغير، والديوبتر لتلبية احتياجاتك الخاصة قد تبدو مرهقة وتبدو وكأنها مهمة مستحيلة. لحسن الحظ، سهّلت الشركات المصنعة للعلب معرفة منفذ العدسة الذي تحتاجه لعدستك بالضبط من خلال توفير “مخططات المنافذ” التي تحتوي على جميع معلومات المنافذ الضرورية لمعظم العدسات. بعد كل شيء، سيكون ترك كل هذا للعميل استراتيجية تسويقية رهيبة!

    يجب أن يكون مخطط المنفذ المقدم من الشركة المصنعة متاحًا على صفحة منتج غلاف الكاميرا. ستخبرك الشركة المصنعة بالمنتجات المحددة التي تحتاجها للعدسة والإسكان. ستظل بحاجة إلى شرائها بشكل منفصل وبناء المجموعة بنفسك بمجرد شحنها، لكن الأمر لن يكون صعبًا بمجرد أن تعرف ما تحتاج إلى الحصول عليه في المقام الأول. نأمل أن تكون هذه المقالة قد ساعدتك بالفعل على فهم دور كل عنصر.

    والخبر السار هو أن عملية منفذ العدسة بأكملها هي الجزء الأكثر تحديًا في بناء مسكن تحت الماء. ومع ذلك، ليس هذا هو الشيء الوحيد الذي تحتاج إلى فهمه قبل شراء مسكن. بعد ذلك، سأتحدث عن أنظمة الفراغ.

    4. How Do You Find the Specific Lens Port for Your Lens?

    The thought of finding the right lens port, extension rings, zoom gear, and diopter for your specific needs may feel overwhelming and seem like an impossible task. Thankfully, housing manufacturers have made it easy to know exactly what lens port you need for your lens by providing “port charts” which contain all the necessary port information for most lenses. After all, it would be a terrible marketing strategy to leave all of this to the customer!

    The port chart provided by the manufacturer should be accessible on the camera housing product page. The manufacturer will tell you the exact products you need for your lens and housing. You’ll still need to buy them separately and build the kit yourself once it ships, but it’s not so hard once you know what you need to get in the first place. Hopefully this article has already helped you understand the role of each item.

    The good news is that the whole lens port process is the most challenging part of building an underwater housing. Still, it’s not the only thing you need to understand before buying a housing. Next up, I’ll talk about vacuum systems.

  • نظام فراغ للتصوير تحت الماء

    على عكس منافذ العدسات، لا تظل أنظمة التفريغ متصلة بمبيتك تحت الماء – وبدلاً من ذلك، فهي وسيلة لإنشاء أختام أقوى على الهيكل، وكذلك لمعرفة ما إذا كان جهازك مقاومًا للماء تمامًا. آخر شيء تريده هو أن يدمر الماء كاميرتك باهظة الثمن. لذا، فأنا أعتبر نظام التفريغ جزءًا مهمًا من أي إعداد للكاميرا تحت الماء.

    المبدأ الكامن وراء نظام الفراغ بسيط جدًا. تحتوي معظم المساكن الموجودة تحت الماء على صمام مخصص يمكنه الاتصال بمضخة التفريغ. قبل الذهاب تحت الماء (ولكن بعد وضع الكاميرا في مبيت الكاميرا)، يمكنك استخدام نظام التفريغ لضخ الهواء إلى الخارج وتقليل الضغط داخل مبيت الكاميرا. هذا يشدد جميع الأختام.

    أبعد من ذلك، يمكنك استخدام مقياس ضغط بسيط (كما هو موضح أدناه) لمعرفة ما إذا كان الضغط سيظل ثابتًا، أو إذا بدأ الهواء بالتسرب بمرور الوقت. إذا تغير الضغط بمرور الوقت، فأنت تعلم أن الغلاف ليس محكم الغلق، وبالتالي ليس مانعًا للماء! من ناحية أخرى، إذا ظل الضغط كما هو بعد 15 دقيقة على الأقل، فيمكنك أن تكون واثقًا من أن الكاميرا الخاصة بك آمنة بالداخل. (يترك بعض المصورين تحت الماء الأمر طوال الليل ليكونوا أكثر حذرًا، ويتأكدوا من عدم تحرك الإبرة بحلول الصباح.)

    تحتوي معظم مساكن الكاميرات تحت الماء على صمام مدمج، لكن الشركة ستبيع مضخة التفريغ ومقياس الضغط بشكل منفصل. كلاهما مهم للغاية لجهازك تحت الماء، أو أن هناك كارثة في انتظار الحدوث.

    A Vacuum System for Underwater Photography

    Unlike lens ports, vacuum systems don’t stay attached to your underwater housing – instead, they’re a way to create stronger seals on the housing, and also to tell if your rig is completely waterproof. The last thing you want is for water to destroy your expensive camera. So, I consider a vacuum system to be a crucial part of any underwater camera setup.

    The principle behind a vacuum system is pretty simple. Most underwater housings have a dedicated valve which can connect to a vacuum pump. Before going underwater (but after putting the camera in the housing), you use the vacuum system to pump air out and decrease the pressure inside the camera housing. This tightens all the seals.

    Beyond that, you can use a simple pressure gauge (shown below) to see if the pressure stays steady, or if air starts to leak in over time. If the pressure changes over time, you know the housing isn’t sealed, and therefore isn’t watertight! On the other hand, if the pressure remains the same after at least 15 minutes, you can be confident that your camera is safe inside. (Some underwater photographers will leave it overnight to be extra cautious, and make sure the needle hasn’t moved by morning.)

    Most underwater camera housings will have the valve built-in, but the company will sell the vacuum pump and pressure gauge separately. Both are absolutely crucial for your underwater rig, or a disaster is just waiting to happen.

  • ملحقات للتعامل مع الكاميرا بسهولة أكبر

    إذا كنت تستخدم كاميرا ذات عدسة قابلة للتبديل تحت الماء، فسيكون الغلاف المقاوم للماء كبيرًا وضخمًا. إنها مجرد جزء من مجال التصوير الفوتوغرافي تحت الماء – فالتعامل مع الكاميرا الخاصة بك أصعب. ومع ذلك، يمكنك جعل الأمور أسهل إلى حد كبير باستخدام ملحقين آخرين للمبيت تحت الماء: أثقال الموازنة والمقابض.

    1. الأثقال الموازنة

    على الرغم من أن المساكن تحت الماء كبيرة، إلا أنها ليست ثقيلة على الإطلاق (على الأقل بمجرد دخولك تحت الماء). وذلك لأنها تصبح مزدهرة – وأحيانًا تكون مزدهرة قليلاً! يميل منفذ القبة الأمامية، حيث يوجد المزيد من الهواء، إلى الأعلى. قد يؤدي ذلك إلى جعل التركيب صعبًا من خلال الضغط كثيرًا على معصمك، وذلك ببساطة من خلال محاولة إبقاء الكاميرا مسطحة.

    ولمواجهة هذه المشكلة، ستقوم شركات الإسكان تحت الماء ببيع أثقال موازنة يمكن ربطها بالسكن ومنعه من الارتفاع للأعلى. إذا كنت تريد توفير المال، فمن السهل أيضًا صنع أثقال موازنة محلية الصنع. كحد أدنى، يجب عليك ربط وزن بأسفل الهيكل للمساعدة في جعله يطفو بشكل محايد، بدلاً من سحبك للأعلى عند الغوص.

    2. المقابض

    تعتبر المقابض إضافة ضرورية لجهاز الكاميرا تحت الماء. ويرجع ذلك إلى أن الهيكل ضخم للغاية ويصعب الإمساك به، مما يجعل من الصعب إنشاء صور تحت الماء أو حتى مجرد الإمساك بالكاميرا بشكل مريح. وبالنظر إلى أن السكن مزدهر، فأنت بالتأكيد تريد قبضة قوية.

    أعتقد أن مقبضًا واحدًا لا يكفي؛ من المفيد الاستثمار في الحصول على مقبض أيمن وأيسر. ستكون هناك أوقات تريد فيها تحرير إحدى يديك أو الأخرى، حتى لمجرد تغيير إعدادات الكاميرا أو التقاط الصورة. أنت لا تريد أن تجعل الأمور أكثر صعوبة مما هي عليه بالفعل تحت الماء!

    وأخيرًا، يمكن أن تعمل المقابض كنقطة ربط لإعداد الإضاءة تحت الماء مثل الومضات أو أضواء الفيديو. كما هو الحال مع معظم المعدات التي تناولتها حتى الآن، تُباع المقابض عادةً بشكل منفصل وتتحمل تكلفة إضافية. ونظرًا لأهميتها البالغة، يتعين عليك أن تأخذ سعرها بعين الاعتبار عند حساب أي مسكن تحت الماء تريد شراؤه.

    Accessories for Handling the Camera More Easily

    If you’re using an interchangeable-lens camera underwater, the waterproof housing will be big and bulky. It’s just part of the territory for underwater photography – your camera is trickier to work with. However, you can make things substantially easier with two other accessories for your underwater housing: counterweights and handles.
    1. Counterweights

    Even though underwater housings are large, they aren’t heavy at all (at least once you get underwater). That’s because they become buoyant – sometimes a little too buoyant! The front dome port, where there’s more air, will have a tendency to pitch upwards. This can make composition challenging by putting a lot of pressure on your wrist simply trying to keep the camera flat.

    To counter this issue, underwater housing companies will sell counterweights that can attach to the housing and stop it from pitching upwards. If you want to save money, homemade counterweights are also easy to make. At a minimum, you should zip-tie a weight to the bottom of the housing to help make it neutrally buoyant, rather than pulling you upwards when diving.
    2. Handles

    Handles are a necessary add-on for an underwater camera rig. This is because the housing is so bulky and tough to grip, making it challenging to compose images underwater or even just hold onto the camera comfortably. Considering that the housing is buoyant, you definitely want a firm grip.

    I believe that one handle isn’t enough; it’s worth the investment to have both a left-hand and right-hand handle. There will be times when you’ll want one hand free or the other, even just to change camera settings or take the picture. You don’t want to make things more difficult than they already are underwater!

    Lastly, handles can act as an attachment point for underwater lighting setup such as strobes or video lights. As with most of the gear I’ve covered so far, the handles are usually sold separately and are an additional cost. Because they’re so crucial, you need to take their price into account when calculating which underwater housing to buy.

  •  معدات الفلاش والإضاءة

    من الممكن استخدام الضوء الاصطناعي تحت الماء باستخدام الومضات أو أضواء الفيديو. في الواقع، إنه شيء أوصي به بشدة – حيث يؤدي جلب الضوء الاصطناعي تحت الماء على الفور إلى تحسين جودة الصور تحت الماء.

    لا يمكنك بسهولة استخدام نفس الفلاش الذي تستخدمه عادةً على الأراضي الجافة؛ بدلاً من ذلك، يجب أن تحصل على ومضات مخصصة تحت الماء. تقدم معظم الشركات المصنعة للمساكن مصابيح ومضات متوافقة مع السكن.

    حتى إذا كنت لا تخطط للحصول على إعداد الإضاءة على الفور، فلا يزال من المهم فهم كيفية توصيل الومضات بالكاميرا. بشكل عام، يوجد كابل إلكتروني يربط الوميض بأداة التوصيل الخاصة بالكاميرا عبر حاجز موجود على الجزء الخارجي من مبيت الكاميرا تحت الماء. ونظرًا لأن هذا النظام بأكمله يجب أن يظل مقاومًا للماء، فإنه يصبح مكلفًا بسرعة.

    تعد مصابيح الفيديو خيارًا أرخص لجلب الضوء الاصطناعي تحت الماء. والفرق هو أن مصابيح الفيديو لا تومض مثل الومضات، ولكنها تحافظ على الإضاءة المستمرة. إحدى مزايا مصابيح الفيديو هي أنها لا تتطلب اتصالاً إلكترونيًا بالكاميرا، مما يجعلها أرخص. وبطبيعة الحال، فهي أيضًا الخيار الوحيد للفيديو تحت الماء. ومع ذلك، فهي أقل سطوعًا بكثير من الومضات. لا يزال يتعين على المصورين التفكير بشدة في استخدام الفلاش بدلاً من ذلك.

    وفي كلتا الحالتين، أوصي بشدة بإيجاد طريقة لجلب الضوء الاصطناعي تحت الماء. ما لم تكن تغوص على السطح مباشرة، فلن يكون هناك الكثير من الضوء للعمل تحت الماء – وستكون الألوان أفضل بكثير مع الضوء الاصطناعي، لأنك تواجه التأثير الأزرق العميق للمياه.

    Flash and Lighting Equipment

    It is possible to use artificial light underwater by using strobes or video lights. In fact, it’s something I highly recommend – bringing artificial light underwater immediately improves the quality of your underwater images.

    You cannot easily use the same flash that you usually use on dry land; instead, you should get dedicated underwater strobes. Most housing manufacturers offer strobes which are compatible with the housing.

    Even if you don’t plan on getting a lighting setup immediately, it is still important to understand how strobes can be connected to your camera. Broadly speaking, there’s an electronic cable that connects the strobe to your camera’s hotshoe via a bulkhead on the outside of the camera’s underwater housing. Since this whole system needs to remain waterproof, it becomes expensive fast.

    Video lights are a cheaper option to bring artificial light underwater. The difference is that video lights do not flash like strobes, but rather sustain constant illumination. One perk of video lights is that they do not require an electronic connection to the camera, making them cheaper. Naturally, they’re also the only option for underwater video. However, they are much dimmer than flashes. Still photographers should strongly consider going with a flash instead.

    Either way, I highly recommend finding a way to bring artificial light underwater. Unless you’re diving right at the surface, there’s just not much light to work with underwater – and the colors will be much better with artificial light, since you’re countering the deep blue effect of water.

  • صيانة مبيت الكاميرا تحت الماء

    تتطلب المساكن الموجودة تحت الماء صيانة وصيانة متسقة لضمان عدم تسربها. ويتطلب هذا أيضًا بعض الملحقات الإضافية، على الرغم من أنها أقل تكلفة بكثير هذه المرة على الأقل. بالنسبة للمبتدئين، تحتاج إلى تشحيم الحلقات الدائرية في مبيتك قبل كل استخدام (أو على أي حال توصي الشركة المصنعة بذلك بشكل متكرر). يتطلب هذا شراء القليل من الشحوم الدائرية الإضافية من الشركة المصنعة.

    يعد استخدام شحم الحلقة الدائرية أمرًا بسيطًا: ما عليك سوى إضافة طبقة رقيقة من الشحم إلى الحلقة الدائرية قبل إغلاق الكاميرا. وهذا يضمن أن المطاط لا يصبح عرضة للتشقق ويحسن الختم.

    أوصي أيضًا بشراء حلقات O إضافية في حالة تلف إحداها. لا ترغب في تفويت فرصة القيام برحلة غوص باهظة الثمن لأن الحلقة الدائرية الخاصة بك في حالة سيئة. والأسوأ من ذلك أنك لا تريد أن تلاحظ أي شذوذ في الحلقة الدائرية الخاصة بك وتأخذ الكاميرا تحت الماء على أي حال خوفًا من فقدان شيء رائع. إن الحصول على حلقة دائرية احتياطية سيوفر لك من كلا الموقفين.

    Maintaining Your Underwater Camera Housing

    Underwater housings require consistent upkeep and maintenance to ensure they do not leak. This also requires a couple more accessories, although at least they’re much less expensive this time. For starters, you need to grease the O-rings in your housing before each use (or however frequently the manufacturer recommends). This requires purchasing a little extra O-ring grease from your manufacturer.

    The use of O-ring grease is simple: You just add a thin layer of grease to the O-ring before sealing the camera. This ensures the rubber does not become prone to cracking and improves the seal.

    I would also recommend purchasing extra O-rings in case one becomes damaged. You don’t want to miss out on an opportunity on an expensive dive trip because your O-ring is in bad shape. Worse, you don’t want to notice an anomaly in your O-ring and take your camera underwater anyway out of fear of missing out on something cool. Having a spare O-ring will save you from both situations.

  • معدات إضافية

    هناك عدد لا حصر له تقريبًا من المنتجات الإضافية التي يمكنك إضافتها إلى جهاز الكاميرا تحت الماء لتحسينها. على سبيل المثال لا الحصر، هناك شاشات خارجية، وأنظمة إنذار للفيضانات، وأضواء التركيز، والعوامات، والأنف، ومعدلات الإضاءة. ليس كل ذلك ضروريًا – معظمه ليس كذلك – ولكن هناك قدرًا مذهلاً من الأشياء ممكنة تحت الماء.

    ومع ذلك، لا أوصي بشراء الكثير من الأشياء الأخرى حتى تأخذ جهاز الكاميرا تحت الماء الخاص بك تحت الماء وترى كيف يعمل. ستكون هناك دائمًا طريقة لتحسين أداء جهازك قليلاً باستخدام هذا المنتج أو ذاك، ولكن يمكنك معرفة ما تحتاجه تدريجيًا بمرور الوقت. المفتاح هو الاستمتاع بهذه العملية – وعدم التقصير في الأمور عندما يتعلق الأمر بالوقاية من الفيضانات.

    Additional Gear

    There’s a near infinite number of additional products you can add to your underwater camera rig to improve it. Just to name a few, there are external monitors, flooding alarm systems, focus lights, floats, snoots, and lighting modifiers. Not all of it is necessary – most of it isn’t – but a shocking amount of things are possible underwater.

    However, I don’t recommend buying too much else until you’ve actually taken your underwater camera rig underwater and seen how it works. There will always be a way to slightly improve your rig with this or that product, but you can gradually figure out what you need over time. The key is to have fun in the process – and not to cut any corners when it comes to flooding prevention.

  • خاتمة

    آمل أن يكون هذا المقال قد جعل عملية تطوير منصة تحت الماء أقل صعوبة! هناك بعض الوجبات الرئيسية:

    احصل على منفذ العدسة المناسب لعدستك (من خلال مراجعة منفذ المخطط من الشركة المصنعة للمبيت) احصل دائمًا على نظام تفريغ ومقياس ضغط للتحقق من مقاومة الماء أضف مقبضين إلى المنصة لتسهيل الاستخدام تحت الماء حافظ على المبيت بمرور الوقت وفقًا لـ توجيهات الشركة المصنعة فكر في خطتك للإضاءة تحت الماء حتى إذا كنت لا تشتري مصابيح تحت الماء على الفور، قم بالترقية بمرور الوقت وفقًا لاحتياجاتك؛ لا تشتري أكثر مما تحتاج إليه مقدمًا!

    يعد أخذ الكاميرا تحت الماء خطوة كبيرة ويمكن أن يكون مدمرًا للأعصاب. ومع ذلك، مع المعدات والمعرفة المناسبة، يصبح التعامل مع الأمر أسهل بكثير. في نهاية المطاف، قد لا تكون هذه العملية رخيصة الثمن، ولكن النتائج لا تقدر بثمن.

    Conclusion

    I hope this article has made the process of developing an underwater rig less daunting! There are a few key takeaways:

    • Get the right lens port for your lens (by reviewing the chart port from the housing manufacturer)
    • Always get a vacuum system and pressure gauge to check waterproofness
    • Add two handles to the rig to make it much easier to use underwater
    • Maintain the housing over time according to the manufacturer’s directions
    • Think about your plan for underwater lighting even if you’re not buying underwater lights immediately
    • Upgrade over time according to your needs; don’t buy more than you need up front!

    Taking your camera underwater is a big step and can be nerve-wracking. With the right gear and knowledge, though, it is much easier to tackle. At the end of the day, it may not be a cheap process, but the results are priceless.

من فريد ظفور

مصور محترف حائز على العديد من الجوائز العالمية و المحلية في مجال التصوير الفوتوغرافي.